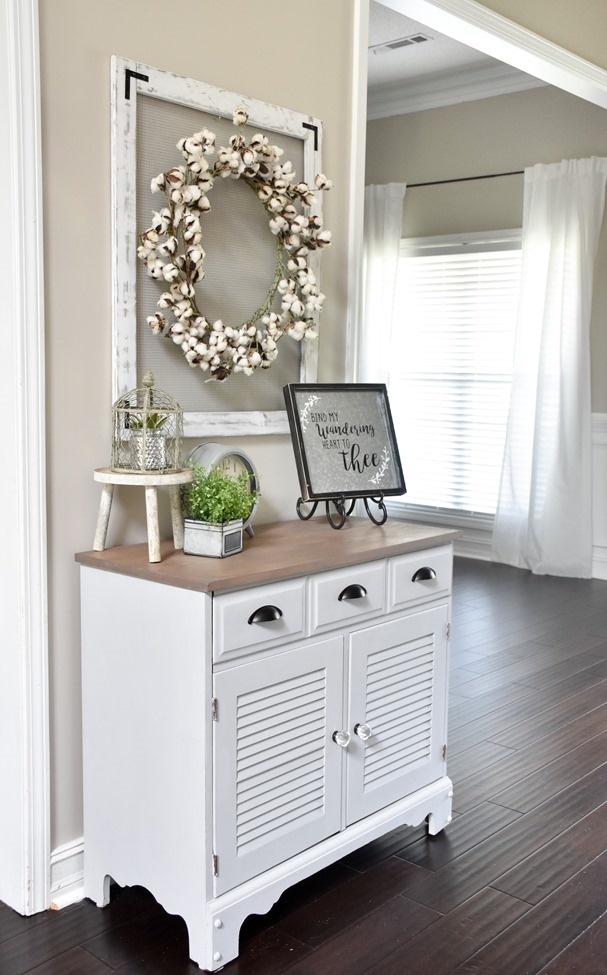
I have another fun furniture makeover to share with you today! If you remember back to my spring frugal finds post I had found this cabinet/console on facebook marketplace for $40 and sold the dresser that I had in my entryway for $40 so it was pretty much an even trade! ![]() I had been wanting to replace that dresser with something else more my style and with more storage and I loved this sort of coastal/farmhouse looking cabinet.
I had been wanting to replace that dresser with something else more my style and with more storage and I loved this sort of coastal/farmhouse looking cabinet.

This piece was in rough shape but nothing some wood filler, sanding, and new paint/stain couldn’t fix. The top wasn’t secure to the bottom, drawer had a crack in at the top and the hinge section on the left had some dug out wood. So I wood glued, clamped, and wood filled all of those areas and then sanded them all smooth.

The top was peeling and in rough shape…

I was hoping the wood on the top would be pretty enough and in good enough condition to stain… so I sanded down to the original wood and it was gorgeous! It had sort of a butcher block look and was in great shape to stain.

I painted the base with Rustoleum Aged Gray chalk paint for the base and Varathane Briarsmoke for the top.
The hardware was broken and missing so I replaced it all with new hardware. I used these cup pulls and these glass knobs from D. Lawless Hardware.

I just love how it turned out! I have been wanting to add some other furniture pieces other than white to my home and I love this soft gray.

I also made a new farmhouse style decor piece to hang over it – tutorial for that coming next week! ![]()

I have all my table linens stored in the cabinet portion and camera accessories in the drawer with space to spare! It really has a lot of storage space and I just love how it looks.

Here’s how it looks in the entryway from the front door. You can find more details of my black painted front door here.

It’s been fun to be redoing some furniture lately! I actually have a few more pieces to work on soon so can’t wait to share those with you!
HI Christina,
You did a wonderful job! Such a nice addition to your lovely home. I have a question: did you wax or seal any areas on the piece after painting and staining?
Thanks,
Mary
Wow!!! I was surprised that this entryway cabinet looked so worn and tired before you remade it. It is an “ugly duckling turned into a swan”! It is good you saw the potential as it definitely is a keeper now!
That is absolutely gorgeous! All your choices in colors and hardware are perfect. Way to go once again!
Hello Christina, I had a few minutes to look back on old posts/instagram photos today, and noticed that you have truly blossomed into a very talented decorator the past few years ….. such a beautiful home you have created! The white cat is identical to my Sweetie, I miss her so much …. our town also has a clock tower which is the centre of Christmas celebrations downtown … you seem to enjoy Christmas! (the clock tower reminds me of the old movie “Back to the Future” … Best wishes for your future endeavours, I enjoy your blog. Ann Lee S, Vancouver Island, BC, Canada
I think this area that you have created is lovely!!!
Wow this piece is really nice and looks wonderful in your entryway. You continue to inspire me to attempt many things in my own home. What I really appreciate about this update is showing the before and all the prep work it took to make it look like the finished project. I often want to add the earrings before the dress if you get my meaning. This post definitely reminds me that the prep work (fixing holes, wood filler, sanding) are the most important factors. Thanks, you are really very talented!!!