
One dresser from my set of $40 yard sale furniture is done! And the before/after still amaze me! I learned a lot in painting and refinishing this piece so let’s delve right in and talk about how I got to the AFTER – it wasn’t without some frustrations, tears and some trial and error.
So here’s the before…
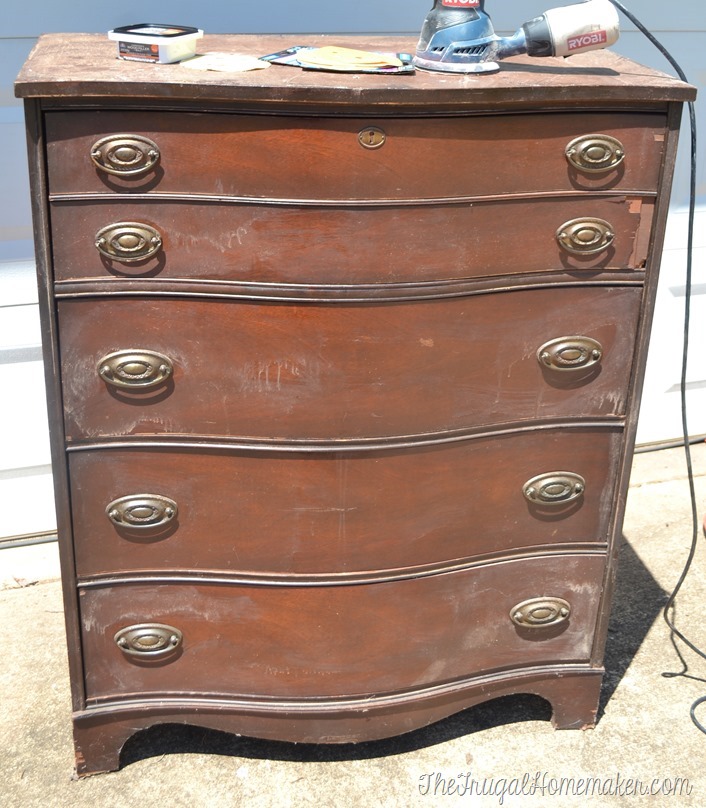
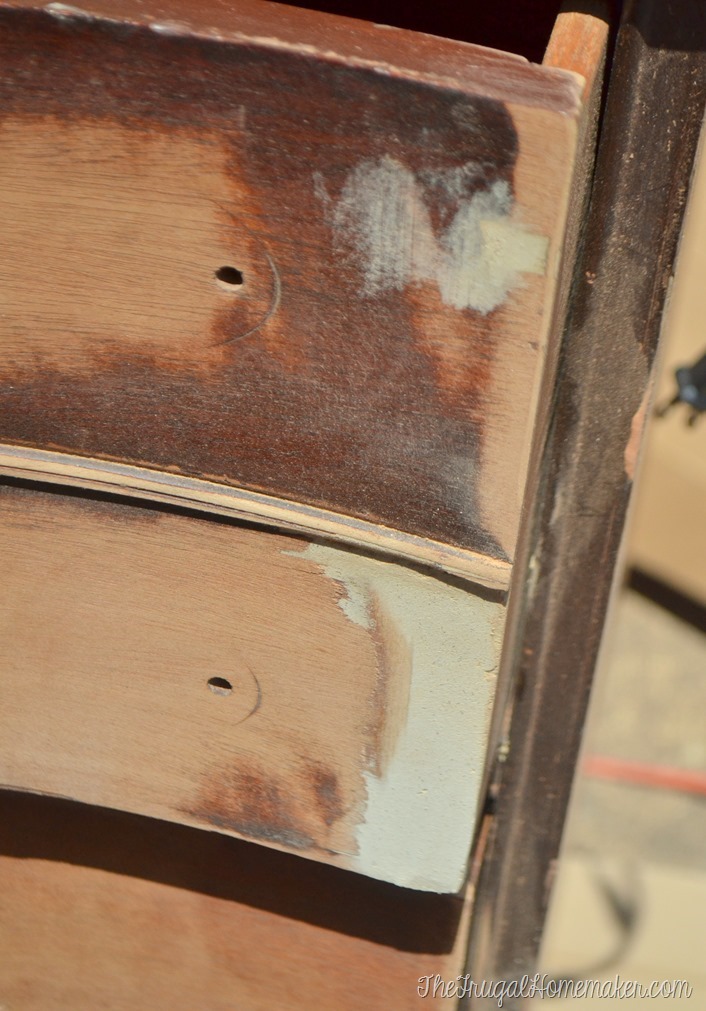
This dresser had the most damage to the veneer, especially on this one drawer. But I knew when I had bought it that I had seen tutorials on how to fix it.
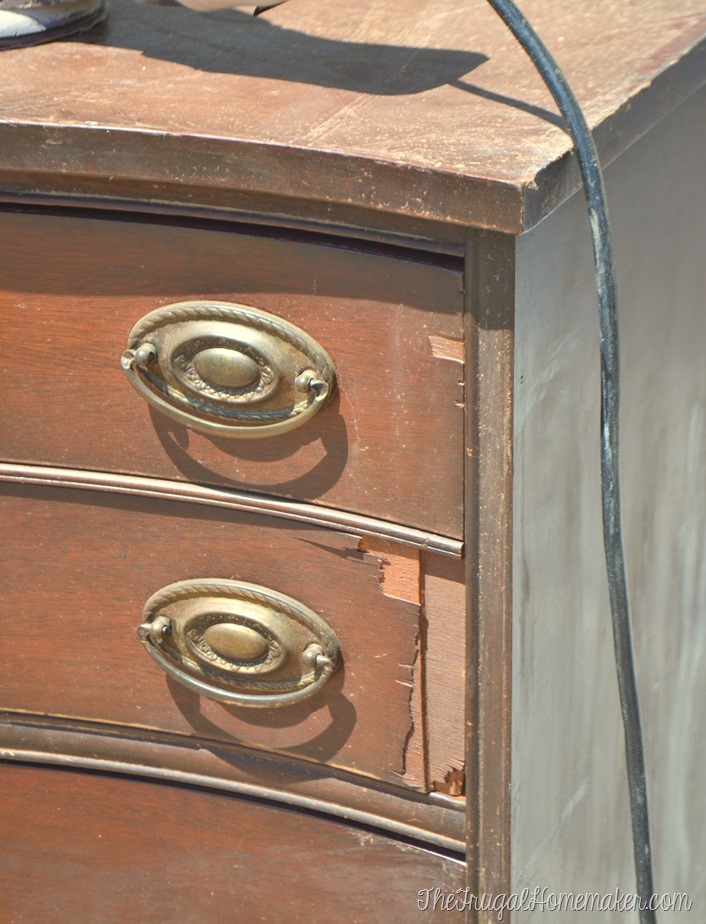
I talked to and relied a lot on my friend Angie’s tutorial on how to fix chipped veneer. She has painted and refinished many more pieces of furniture than me and her tutorial gave me some great tips. Because in the beginning, I wanted to see if I could salvage this piece and repair the damage, strip the old stain and restain it – I used a stainable wood filler by Elmer’s. If you know you are going to paint your piece – you can use any kind of wood filler or Bondo like Angie used.
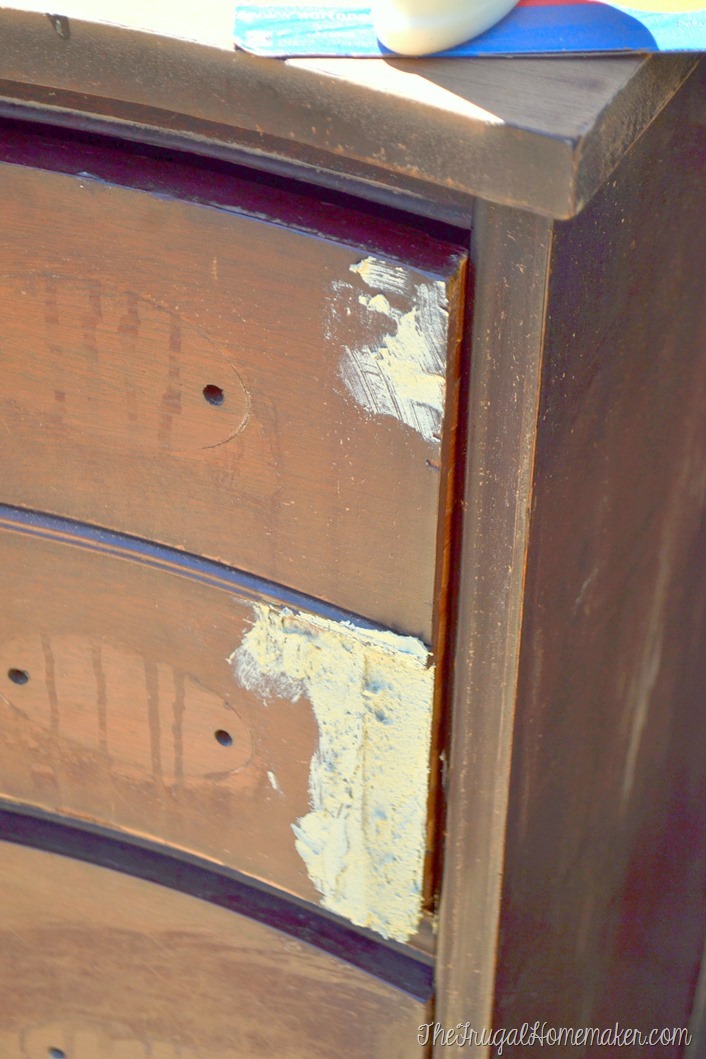
You just apply the wood filler to the places that need repair – I used a little rubber spatula made for caulk or wood filler. Let dry and then sand.
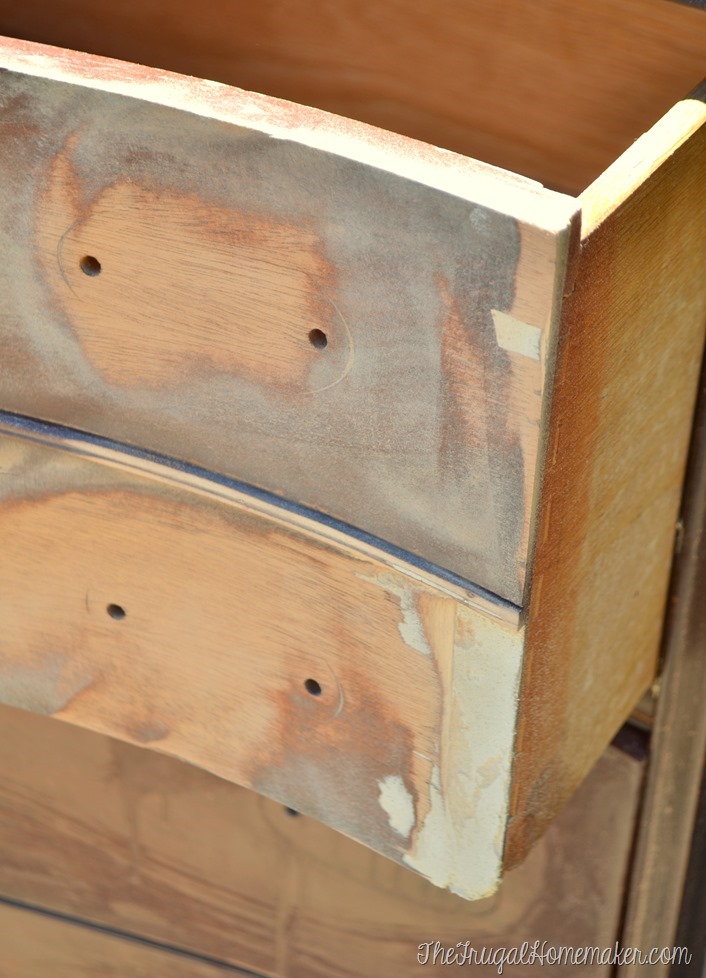
For this spot that was broken off several layers deep, I had to repeat that process several times. I was also having to build back up the corner of the drawer. So apply, let dry, then sand – until you get the whole spot completely built back up and smooth.

I think I did one more light coat after this picture just to fill in those tiny cracks on the edge. But it was looking much better!
I tried using Citistrip to strip the stain off but it just wasn’t working – it would have taken many, many applications and honestly never gotten down to the bare colored wood since the stain penetrates the wood and basically dies it. So the only way I would have had to get all the old stain off the piece was to sand. Which worked perfectly on top. But the front had trim and ridges and there was no way I could sand in between and around all of those – so painting was the only option. So I just sanded any areas that need smoothing, and completely sanded the top down so that I could stain it.
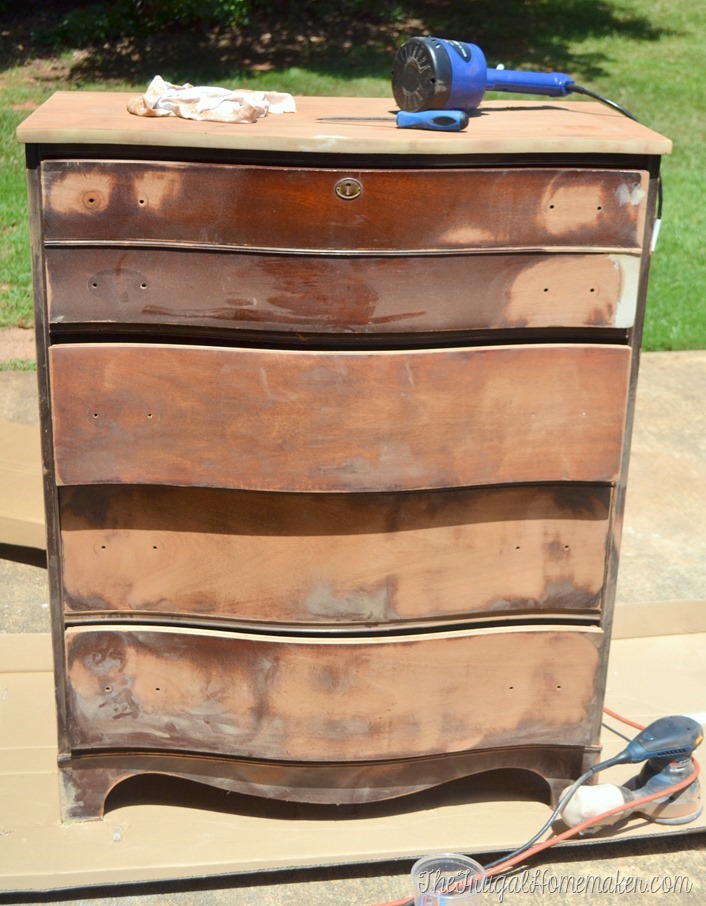
I taped off the top, wiped everything down, and was finally ready to paint! I used a sprayer (which I will talk about more on next furniture post) and it applied the paint super smooth and I loved it. Until a few minutes later when my dresser started having some rash problems. ![]()
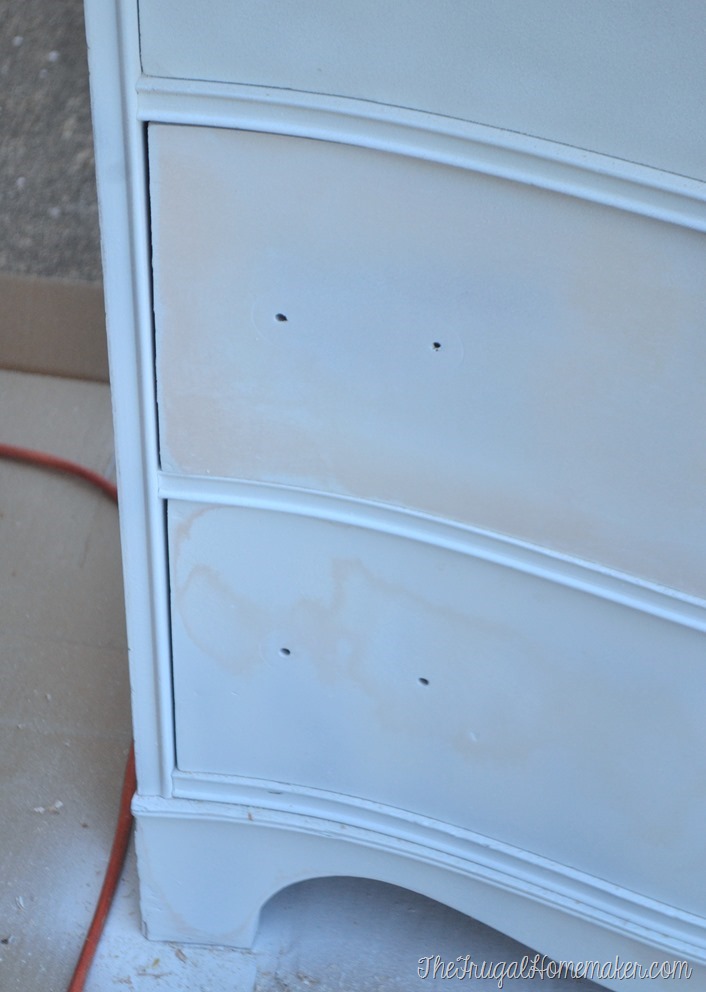
All these pinkish spots started appearing all over the front and side of the dresser. The stain or wood was bleeding through the paint. I tried another coat of paint – same thing happened. I was beyond frustrated and called my friend Angie again… She suggested several things and I also did some reading online. I did try white spray paint but I got runs in the paint and wasn’t very happy with that. I didn’t think that primer by itself was going to work as many people said the wood still bled through primer. And I was using Behr Premium Plus Paint and Primer in One (in Ultra Pure White) so technically I was already using primer and it was still was bleeding through. I finally found this post by Beth at Home Stories A to Z and it seemed like a simple and easy fix.
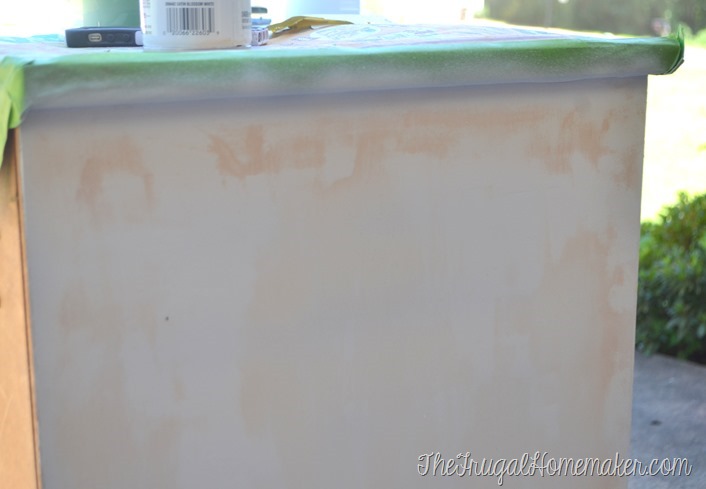
I went to Home Depot and picked up this magic can of Zinsser Shellac. It is a natural based product made from the Lac bug, has virtually no odor, and is able to be cleaned up with denatured alcohol – so it is not oil based. I have never used Shellac before but I was pretty impressed with the ease of application, the shine that it gave, and I actually ended up using it on top of the stained top as my finishing coat (more on that later).

It is a SEALER also so it seals in the dyes in the old stain and the wood and prevents it from coming through and I have also read it will help block out odors as well. Here it is being brushed on. It does have a bit of a yellow look so I wouldn’t use it over white paint as a finisher but over stain it worked great. It is thin and dries super quick. I should have done 2 coats and I will on the next dresser because when I started painting again, I had one little spot that must not have gotten covered that bled through again but once I added another thin coat of shellac to that area and painted again – it covered perfectly.

So here’s what I will do on the next dresser – I will fill, sand, and repair all dents, cracks, anything that needs repair and smoothing. Then I will add 2 coats of shellac, and I think next time I will also do one coat of plain primer just because I think the paint may adhere a bit better, then do 2 light coats of paint. This piece was definitely trial and error but I learned lots! I have painted several other pieces of furniture but most of them have been the french provincial pieces that were already painted or had that streaky veneer finish. And the one wood piece that I did (my $3.00 coffee table) I didn’t have the bleed through problem.
So here’s the dresser all painted and ready for stain on the top. I really do love the look of dark stained wood and I love the two-toned finishes so though this was a perfect way to lighten up the bottom and let the curves and character show while also embrace the beauty of the wood grain on top.
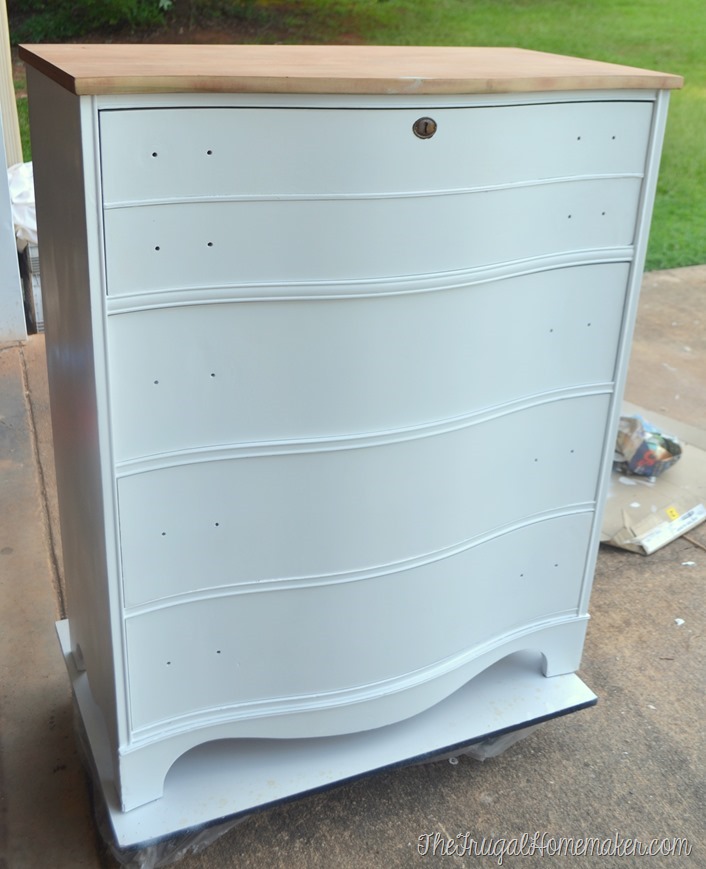
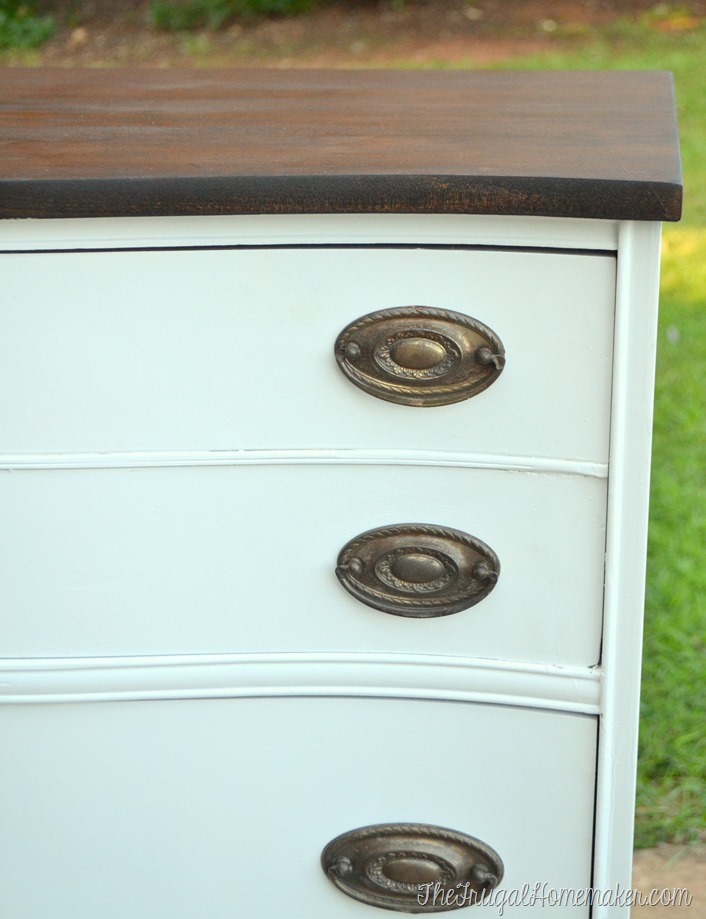
I did one coat of a dark stain and then used the Shellac as my sealer since I loved the way it looked so much on the wood. I kept all the old hardware and just scrubbed the grime off of it – I love the aged, old brass patina to it and it ties in perfectly to the dark top.

Never would have known that this drawer looked so bad before!

Fixing the veneer was honestly much easier than I thought it would be and would probably a bit easier using a non-stainable filler like Bondo – I may try that on the next piece. Just apply, sand, reapply, sand and repeat until you get smooth filled in finish. So don’t be afraid of this thrift store pieces that you see with broken veneer – you can definitely repair it if you want to paint the piece.

Oh how I love the contrast of the dark wood, the white, and those aged brass handles!! The other dresser that I am refinishing next is longer and short so you will be able to see and enjoy the dark stained top much more!

And that keyhole… LOVE! I am glad I didn’t paint over it especially since I kept the old hardware. I just taped it off with painters tape and cut around with a razor to get a nice clean edge for painting.
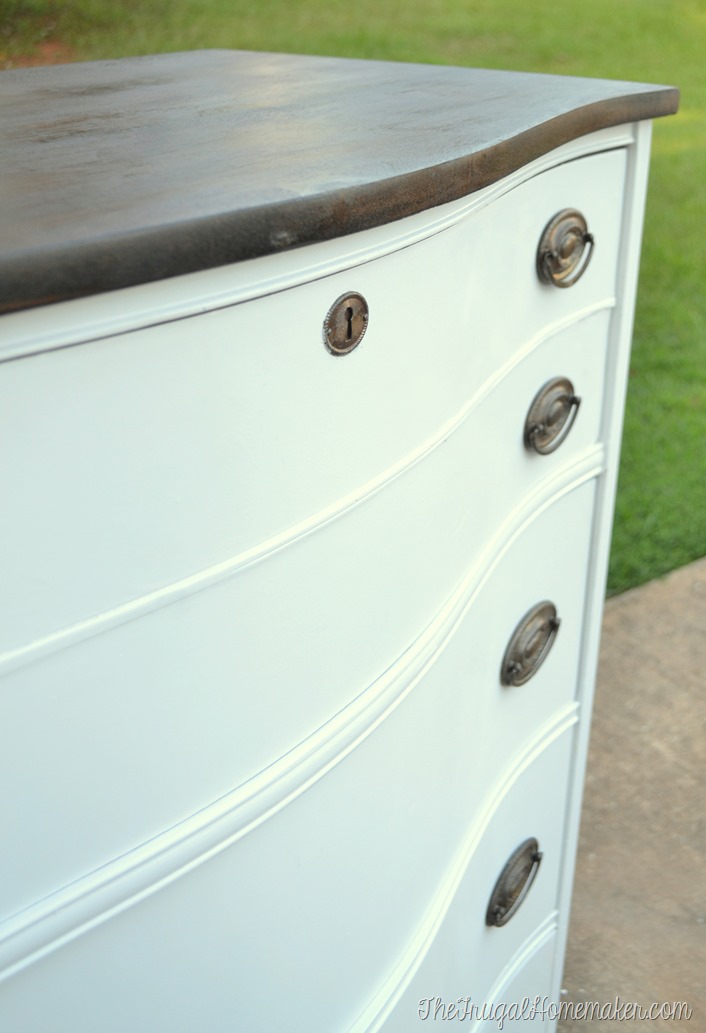
I love the curved front too.

One piece down, and two more to go! I have a long dresser just like this and then I am also going to paint a smaller hutch/dresser to use as a nightstand – it is a French Provincial piece I picked up a while back. This set also has a matching mirror for over the long dresser and I haven’t decided if I will use that mirror or a more ornate mirror that I have. Getting started painting the next piece today!
Have you ever painted or refinished old furniture? Did it go smoothly for you or did you run it to lots of problems?
Disclosure: I am partnering with Behr as a Behr DIY Expert and was provided paint for this project. But all opinions and thoughts expressed are all mine.
Looks great!
You did a great job, Christina. I normally would overlook chipped veneer furniture, but maybe I should give it a try. Love the look of this piece completely….bowed front, antique handles, keyhole and all. The contrast makes everything really stand out.
I think the end result is amazing! Great job!! Do you have any idea how old the dresser is? I love the curves and the hardware. The oldest piece we have was made in 1900 🙂
You have a gift Christina! I wish you were closer to me. I would hire you to fix my pieces and find a dresser for me.
STUNNING!!! Absolutely beautiful job. For sure, I would have passed over chipped veneer. Thanks so much for showing us how to fill it.
I just finished painting a dresser, bureau, and two end tables – black. It really looks navy blue. But it was so gorgeous!. When I went to put the sealer on – a white film came over it! Ack! I called the company – and was told I needed to let the paint cure for a month or so. Darn! I have to re-sand and do it over.
Love the finished piece. Beautiful. I have a dresser that was my Grandmother’s. She told me she received it in 1910 as a wedding gift. It went through a house fire but only sustained a tiny bit of bubbling on one side. One of the drawers has veneer missing much like yours. I will definitely try my hand at repairing and then I will paint it. Thanks for the great lesson.
how old is your grandmother?
Beautiful job and great tutorial – thanks for sharing!
Super job.. Very pretty!
Have a wonderful week…
~Sherri
Great job Christina. I love this!!
I really enjoyed this article. It answered so many questions I had about chipped veneer. Your project turned out beautiful.
Zinsser is a lifesaver! I am painting over some very dark paneling at the house we are moving into and it kept bleeding through. I had used Killz and a paint with primer and still bled through! Someone told me to try Zinsser and it worked the first time!
This is a great article and I love how your piece turned out!
Nice job! I’ve used the Zinsser shellac for bleed-through, but really like using their B-I-N Shellac Base Primer a lot better. It is perfect for the bleed-through, but also helps with paint coverage.
Great post. I am refinishing two dressers to use as a TV stand and a kitchen island. I used Zinsser Bulls Eye 2 Primer and have applied two coats so far. I cleaned the dressers before painting and also completely sanded one of them with an electric sander, even though this primer says no sanding needed. I applied using both a roller and a foam brush to get in the cracks. I waited over an hour between the two coats.
However – the primer is completely cracked.
Any advice for how to fix this? Do we need to sand it and start over with a different primer?
Any help is appreciated!!
Found you on Pinterest!
So I’m painting a HUGE piece white (6 ft long, 9 drawers) to be used as a tv stand. I prepped and sanded it, but after two coats of white paint it’s getting that ‘rash’ that you have pictured. Can I shellac it with the product you suggested and then add another couple coats of white paint over that?! Help!
Gorgeous!!!!
Beautiful
Looks amazing! Great job!!!
Hi Christina, great job on your dresser, it looks amazing. Just a quick question. When you bought the shellac, did you have to remove all the paint coats you’ve applied before or you applied the shellac on top of the paint and then painted again? Thanks Monica
Hi! Love what you did to this piece. I was so pleased to find your project with such great details because I own 3 pieces of matching furniture that belonged to my Grandparents. Have debated on painting them for many years, you just made it easier for me. Thank-you!
Patti
Always go with oil based primer even comes in spray version. Shellac I heard is more pain then worth especially if no shine is wanted and more matte. Always do test you can even use water based version. Sprayers are a great choice. I have wagner home decor one but need to try, but needed to confirm chipped veneer issues. But, hey I may try shellac on a difficult piece. Never know and yours looks great. Still think oil Bin primer would have done it best. Try next time. We all learn as new challenges arise.
wonderful job
What a fantastic resource! I’ve pinned it for my future reference because I know there will be some furniture painting in my very near future.
Thanks for putting this together Christina
I have this same French provincial bedroom set from my mom and dad. I have painted all my pieces with Annie Sloan chalk paint. I have also repaired my share of damaged veneers using Elmer’s wood filler and had great results! I love love love the way your piece turned out!!
I’m also thinking I should use Behr paint for the next piece. Thank Uou for inspiring me and the tips on bleed through . I’ll never shy away from a damaged piece again …. Bondo is definitely the way to go when you buy a piece that has significant
Veneer damage.
Wow! I’d love to go to garage sales with you! Grear job on this, and I look forward to seeing your future projects.
Thanks for the advice on fixing veneer – that’s what I was searching when I found your blog/post. Love the finished dresser – it’s beautiful! Looking forward to following more of your posts. (I’m Molly’s SIL, by the way!)
Your dresser turned out beautiful. Your explanation of veneer repair was very helpful.