Today is my first day to share in our A Homemade Christmas series. I been loving it so far. Make sure you head over and check out Christa’s pinecone cluster and Heather’s poinsettia pillow. They are both on my list to do now too. ![]()
I don’t know about you but I LOVE mercury glass. It just calls my name when I see it in stores. I don’t know that I have ever seen a piece that I didn’t want to take home, but unfortunately my budget has allowed very few pieces to come home with me.
Like these Mercury Glass Ornaments from Pottery Barn – $29.50 for a set of six.

As much as I love them, $29 is more than my entire Christmas decorating budget so that is not going to happen. Since I knew even last Christmas that I wanted to do a different theme/color in my Christmas décor this year, I have been looking at yard sales and clearance sales all year. I was excited when I found several boxes of glass ornaments for $1 a box at a yard sale.
The key to making DIY mercury glass is one certain paint – Krylon Looking Glass Mirror-Like spray paint. I had a hard time finding it – Wal-mart, Home Depot, Lowe’s don’t carry it. And I couldn’t find it at Michael’s either. I FINALLY found it at Hobby Lobby! But make sure to bring/use a 40% coupon because it is expensive! You can also buy it on Amazon. (Affiliate link – if you buy anything through it, you help support my spray paint habit.
![]() )
)
I also used some metallic gold craft paint, a spray bottle filled with water, a hairdryer and some q-tips (not pictured).
I read many tutorials that I found on Pinterest on how to do it. They varied a little, but basically had the same basic instructions.
1. Spray the INSIDE of the ornament with the Krylon Looking Glass spray paint. Some tutorials said to spray the inside first with water, but I found that didn’t work as well. The way this paint works is the reflective or mirror finish is actually on the opposite side of the paint after it is sprayed. So you want that to show through the glass.
2. Swirl the paint around in the ornament. But this paint is thin and runny and will just pool down in the bottom. At this point you will be thinking that I am crazy and this will never work. I promise it will – just bear with me a minute.
3. What worked best for me was to grab my hairdryer and while I was swirling the ornament around in my hand I was blow drying inside the ornament. I just did this for 10-20 seconds until the paint was ALMOST, but not completely dry.
4. Then I misted the inside of the ornament with water and shook it around a little. You want BIG drops, not little drops.
5. You can also rub the inside of the ornament with a q-tip to rub off some of the paint if you want. I did that with some when I couldn’t get big drops.
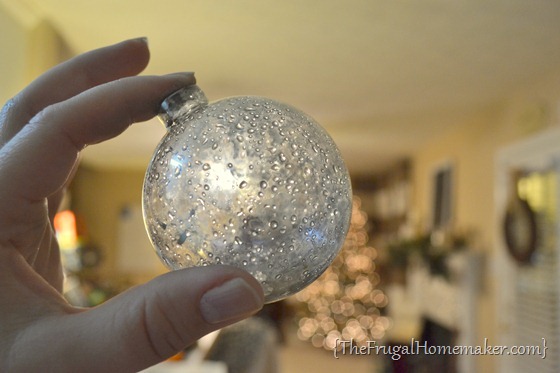
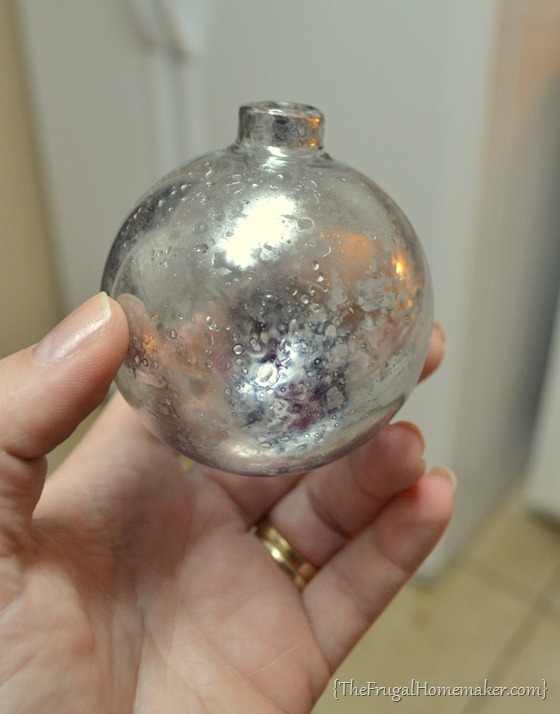
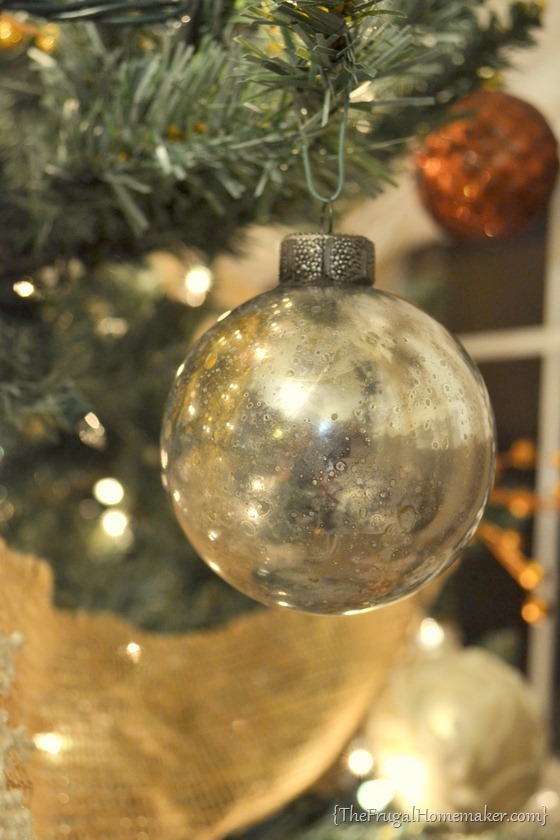
As the paint dries you will see it become reflective. And you will have the perfect mercury glass finish!
In one of the tutorials I read it recommended doing the gold paint as well and I do think that adds a little bit of antiquing to the finish. I dropped one drop of gold paint in the ornament and then misted again with water and swirled around drying with my hair dryer until it was dry.
And I painted the the metal tops. Mine were bright silver, but most vintage mercury glass ornaments have dark tops. So I sprayed mine with a light coat of Krylon Oil Rubbed Bronze spray paint to give them more of an antique finish.
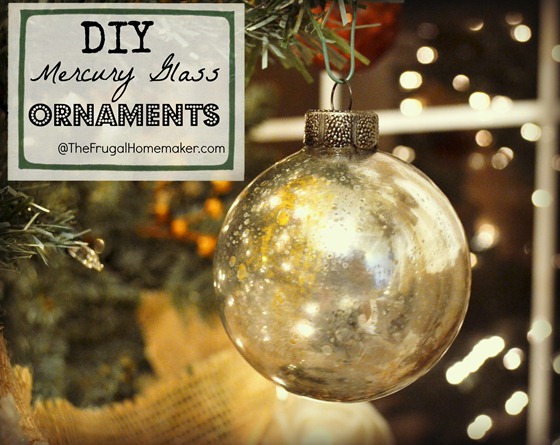
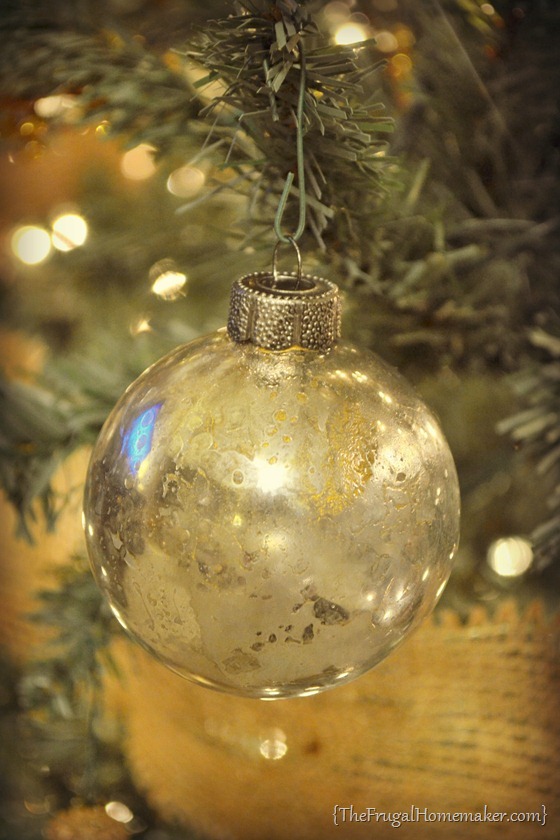
I love them!
And they were pretty simple to create! I did 12 in about in a hour.
You’ll have to wait until I reveal my tree to see them all in place on my tree. I am still working on finishing touches on the Christmas decorating in the house – how about you? All of your decorating done, haven’t even started, or just about done?
And here’s the rest of the projects in our A Homemade Christmas series:
Laine at It’s Just Laine will be sharing her post tomorrow and I am sure you won’t want to miss it.





Very pretty Christina! I LOVE mercury glass too!!
Did not work!
Waste of money!
It does work, but it takes patience and practice to get the technique right. You can Google some more thorough tutorials, as this one is is missing some of the steps included in others. The way I do it is to do about 3 to 5 very thin coats. For each coat, spray 3 to 4 short blasts of the paint into the bulb, followed by an equal amount of misting spray (equal parts vinegar and water), swirl it around to coat the inside for about 30 seconds, shake vigorously for a few seconds, and THEN blow dry and mist as Indicated above. I also like using the gold Rust-Oleum Mirror Finish Spray Paint for the final coat, using the same technique. a
To start over, get some cheap oven cleaner spray (Dollar Tree is fine), spray into your “ruined” ornaments, shake them up to coat, turn them upside down to drain, let them sit for a few minutes, then start rinsing and shaking up the water inside until all paint is removed. Rinse with alcohol, and you’re good to go. NOTE: I have only used oven cleaner on glass ornaments, NOT plastic! This also works to remove Mod Podge (even baked on) and Pledge/glitter. Have also sucessfully used it to remove dried polycrylic.
I may have missed it but I did not see vinegar mentioned in the original post. That may be why the process failed for Janet W Jones.
I am right there with you. I LOVE mercury glass. Anywhere. Everywhere. Next time, do t use water. Use windex to mist it with. I’m digging through my box, looking for glass balls. I have several cans of the Krylon. I have gallon jars done this way in my sewing room. Pretty candle jars? Yep. Got them sprayed too.
Those are gorgeous. Thanks for the instructions.
This is great tutorial! I have some old clear ornaments I am going to have to try this on!
Your Mercury Glass look-a-likes turned out gorgeous. I have seen so many try these with silver paint lately and it just does not work. I want to do this so bad. I wonder if the ornaments that look like glass but are actually plastic would work? I have a bunch of those and a bit of Looking Glass paint left.
They are gorgeous! Thanks for sharing your technique. I love mercury glass too and have picked up a few pieces at yard sales. I’m planning on incorporating them in my in-laws 50th wedding anniversary party…but until then, I’ll display them in my holiday decor.
Love this idea! Will have to put it on my list of ideas for gifts for next year. One of my daughter-in-laws decorates in silver and blue. These would be a lovely addition to her tree! Thanks!!!
Myra
Ok…my Christmas to-do list keeps growing. It’s gonna be a mile long before this series is over. lol! And I may just have to support your spray paint habit (through Amazon), since we don’t have a Hobby Lobby nearby. I’ll check my other local stores first.
I love it!!! Thanks for sharing. 🙂
try Michael’s. I read on a tutorial that they (might) have it. But not with the spray paint (I checked ours and they didn’t have it there) The other blogger said it was in the glass painting supplies.
And yes, my Christmas to-do list is growing by the minutes. I already feel frantic and it isn’t even December yet. Craziness!!
Very pretty! Can’t wait to see your entire tree. 😉
So pretty!! Can’t wait to see everything together on your tree! : )
I love mercury glass. I have a few precious pieces that I decorate with every year, but now I can make my own. Thanks so much 🙂
I am also a huge fan of mercury glass, and as far as ornaments go, I have only 2 that I found in pink. I never, ever thought about making them, but your tutorial makes it look so easy! That’s great.
I have just a tree to put up, maybe a few other things too. I’m trying to change my look as well. My latest post shows some photos.
Have a good day!
Love these Christina!!!! You did a great job! I hope your cute little nephew does not break any of them.
Beautiful!! Never would guess those were DIY!!!
These turned out beautiful! I have been trying to find this spray paint everywhere, I will have to hit up Hobby Lobby. Thanks!
One week ago I found the spray paint @ Michaels. You have to get a salesperson to unlock a cabinet to get it out.It was $12.99. I haven’t used it yet.Good luck.
I have been wanting to do this! Thanks for providing an honest tutorial- it will save me time! They look beautiful!
These turned out really well. I’ve had 3 boxes of these glass ornaments for a few years now. Think it’s time to do this with them! Thanks for the tutorial.
Oh my goodness I have been drooling over those same stinkin’ $29 ornaments in the PB catalog and simultaneously wanting them and wondering who would actually pay that much money for 6 little balls of glass. You are now officially my hero with this tutorial…..love love LOVE!
Christina! This is the best faux mercury glass tutorial that I have ever seen (and I have looked at A LOT)! I had gotten the looking glass spray paint before but was underwhelmed with how it looked on a solid piece…now I know why thanks to you. I am going to try it again. I am going with a silver theme on my tree this year so I hope to make some ornaments using your tutorial.
Wow Christina, these are absolutely gorgeous! I love them…and with my tree theme gold and burgundy, I think they would add so much to it! Thanks for sharing, I’m pinning this!
Debbie 🙂
Wow, what a great project. I have to say, when I first started reading the post, I couldn’t tell which picture was of the original and which one was the knockoff. Yours look just as beautiful!
I am running out of time to make these this year but I think they will be a project for after Christmas so that I have some new pretties for NEXT Christmas. Thanks for sharing your tutorial!
Great tutorial on mercury glass ornaments. Visiting from KnockOff Decor. I too have read about spray painting the inside, some crafters say to cover the outside while spraying. How on earth did you spray the inside with that tiny hole the ornaments have without it getting all over everything? Just curious. I’ve sprayed vases and had a hard time keeping it inside.
These turned out so pretty! I love mercury glass ornaments. I bought a couple of them at Walmart for a lot less than PB’s! I have a dozen clear glass bulbs I never did anything with. I’m going to try these! Thanks for sharing 🙂
loved the ornament i had made some with spray paint a bucket of water and u dipped the balls in the spray painted water but these were much better thanks
You’re site finally made sense for me!! I tried the Mirror paint on a lamp and couldn’t figure out why it wasn’t shiny like all the pictures I’ve seen.. SPRAY ON THE INSIDE….. Got it.. So now my idea won’t work.. so perhaps silver leafing… Big time bummer.
Don’t think I’ll even put up a tree this year. Only have a college-age daughter left at home. She’s too busy with prepping for finals to help out. Maybe just the count-down calendar we have used every year.
Love your blog and this project – so creative and fun! Just wanted to let you know I featured it in my roundup of glass ornament crafts here. Feel free to check it out if you want and hope you like it! : )
-Mel the Crafty Scientist
Just found this mirror paint at Walmart in specialty paint section in the spray paint section!
yay! Yes, I have definitely seen it carried in more places now. And Rustoleum has their own version now too.
We don’t have any Hobby Lobby near us, but they do carry it at our local A.C.moore craft store.
Wow, you are a genius! Thank you so much for this DIY. I love the mercury glass ornaments too and can’t believe how gorgeous these turned out. Thanks for sharing.
I love your ornaments! I wish I had found your tutorial before but it’s better late than never, right? I found you on Pinterest, by the way, while searching for Vintage Christmas Ornaments. I searched for the Krylon Looking Glass Mirror-Like spray paint immediately. I needed to buy it online, since I live in Spain. Sprays cannot be shipped overseas from the US but I was finally able to find an online shop that will ship to EU countries: Overstock.com . I thought I’d leave this comment so other possible European buyers may find their way to the product.
I am also wondering how you managed to spray inside the ornament and whether the golden paint you used was acrylic or of another kind?
Thank you very much for this beautiful tutorial! Merry Christmas!
I took the cap/hangar part of the ornament off (it just pops off) and directed the nozzle directly inside. And yes, the gold paint was just acrylic/craft type paint.
Thank you so much, Christina! I’ll try the technique as soon as the spray paint gets here, even though it will be past Christmas. The Happiest of Holidays to you!
Try using white vinegar instead of water to mist inside, it gives a better effect IMO.
Could I use an aqua or blue paint–watered down–on the inside as well? And I assume it would be after the inside has dried completely? or while the water drops are still present? Thank you!
Thank you for sharing this tutorial. My next project! I appreciate the detailed description and photos. They turned out beautifully.
Curious what kind of gold paint you used? Perhaps not brand specific so much as type of paint. Acrylic?
I’m curious what kind of gold paint you used? Perhaps not brand specific so much as type of paint. Acrylic?
I’m curious what type of gold paint you used as well?
The mirror finish (silver) is Krylon Looking Glass spray paint. It absolutely HAS to be the Krylon Looking Glass, or you will NOT get the same result.
I think she used a liquid metallic acrylic for the gold. I like the Rust-Oleum Mirror Effect in Gold, as it has the same consistency and similar reflective properties as the Krylon Looking Glass. Haven’t seen the Looking Glass in gold anywhere. l
*sigh* I do wish Krylon would start making this in additional colors. It’s pricey, but when using this way, it only takes a little.
I really can’t wait to give this a try! I did find the Krylon mirror glass spray at my local Walmart…which is fantastic since I don’t have a Michaels close by. I was wondering is I can use a different color of metallic paint…the colors I use are pinks and purples? Hopefully it will work!! Thank you for sharing how to make these!!
My results for “faux mercury glass ornaments” were good with spraying inside the ornaments FIRST with the vinegar/water mixture in a fine mist small bottle. Second, I sprayed a small spurt of Krylon Looking Glass spray paint and swirled it around while focusing my hair dryer on the ornament both inside and outside on a medium setting.until the splattered mirror effect appeared. After experimenting, I found that only 2 light coats of Looking Glass is enough to create a mottled mirror effect. At this point I squeeze a few drops of deeply-hued (green, blue, red, or purple) ALCOHOL ink and shake and swirl the ornament vigorously. This method gave me the best results.
Followed your tutorial and mine did not look anything like yours. I have to say, it was a waste of money and time. Glad I only bought 4 glass ornaments and they were on sale cause they will probably be going in the garbage.
I was wondering if this makes it opaque or will lights show up inside? I am looking for different looks for the glass blocks I am working on.
Can’t wait to see your tree. Thank you for sharing.