I am so excited to share my laundry room makeover with you today! I just LOVE how this turned out and I’m so amazed I was able to pull it off and come under budget (I was a bit nervous with that this time!) I’ll get to all those details later but for now let’s just see the before and after pictures!
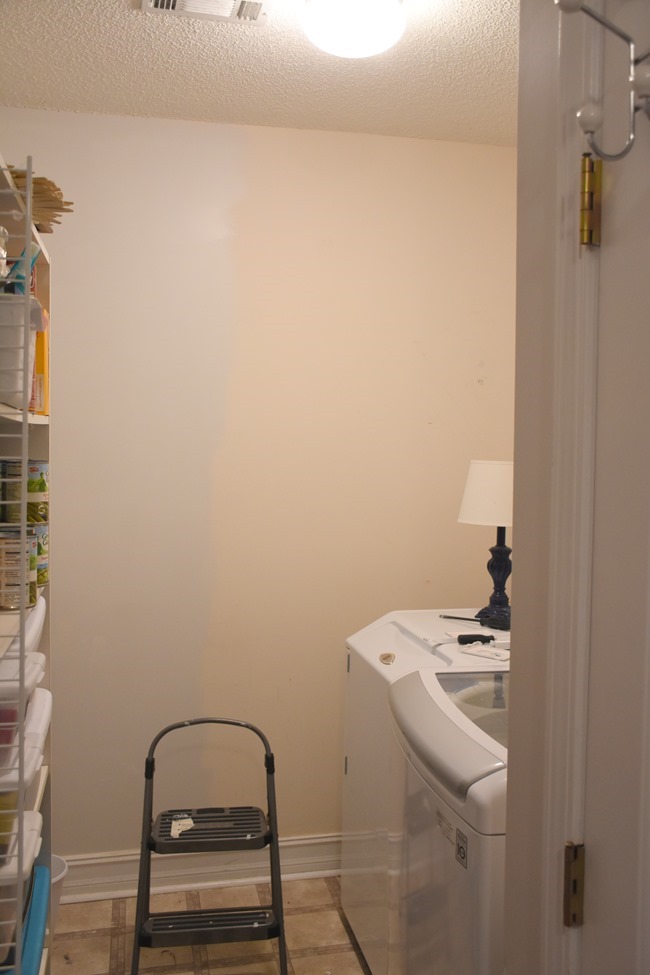
Hard to believe this is what my laundry room looked like at the beginning of January…

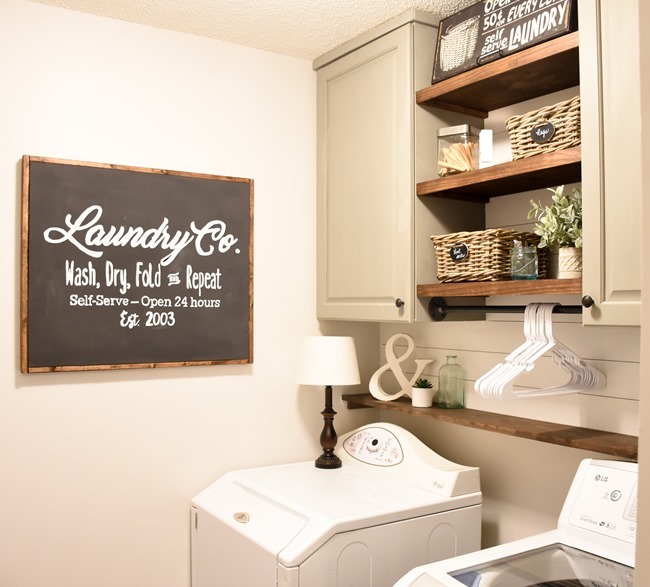
And this is how it looks now!

I walked in there last night to start yet another load of laundry and it just felt so right! Like it has always looked like this and it was meant to look like this!

Another before – that one wire shelf installed in pretty much every laundry room/laundry closet are such a waste of precious space, hard to reach, and the most unattractive look ever.

And now! Lots of storage and pretty too!

So let’s go back and I’ll break down every project I did along with budget too.
Week 1 began with removing that wire shelf and painting the room – you can see before/after pictures of that here although the color change was subtle. This room I don’t think had ever been painted since the house was built over 15 years ago and not since we moved in a year ago. So the walls had old holes and tons of scuffs and the trim was just nasty! So it went from builder flat cream colored paint to a very light greige paint called Statueseque by Behr.
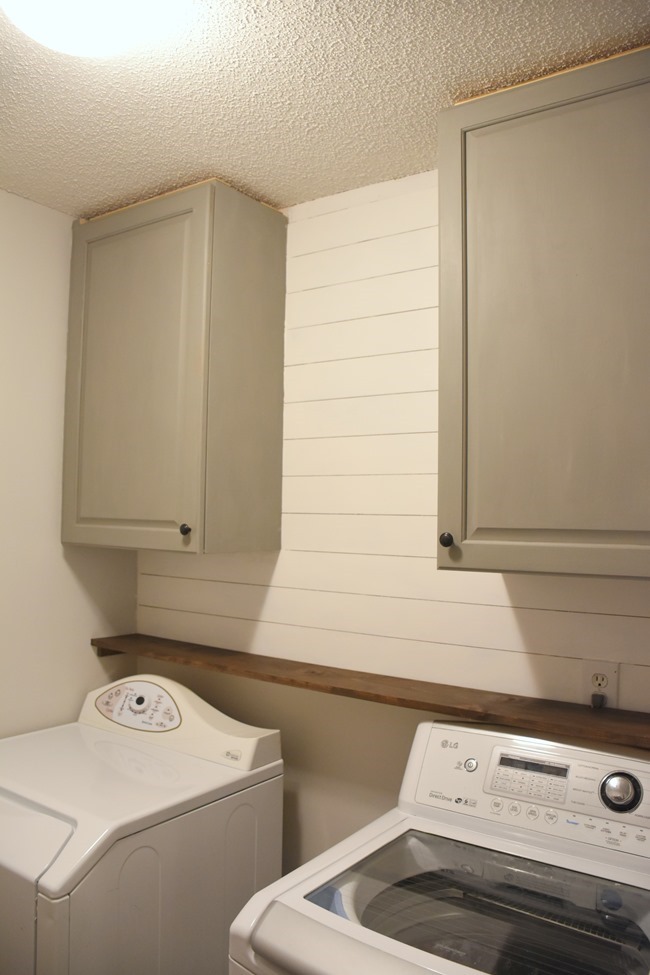
I had picked up these cabinets at the Restore a while ago in anticipation of this room makeover and once I got them up I decided that a planked accent wall (or faux shiplap) would look amazing between and below them. I just happened to have 3 strips of 8 inch plywood left from doing shiplap in my daughter’s nursery and it was just enough for this area once I ripped it down to 4 inches wide. You can see all the details on installing the cabinets and shiplap in this post.

I painted the cabinets gray with Rustoleum Chalked paint and the shiplap with white trim paint. Then I also installed an 8 inch stained wood shelf right on top of the back of the washer/dryer. I love how this covers that gap along with hiding the cords and the washer hose box.
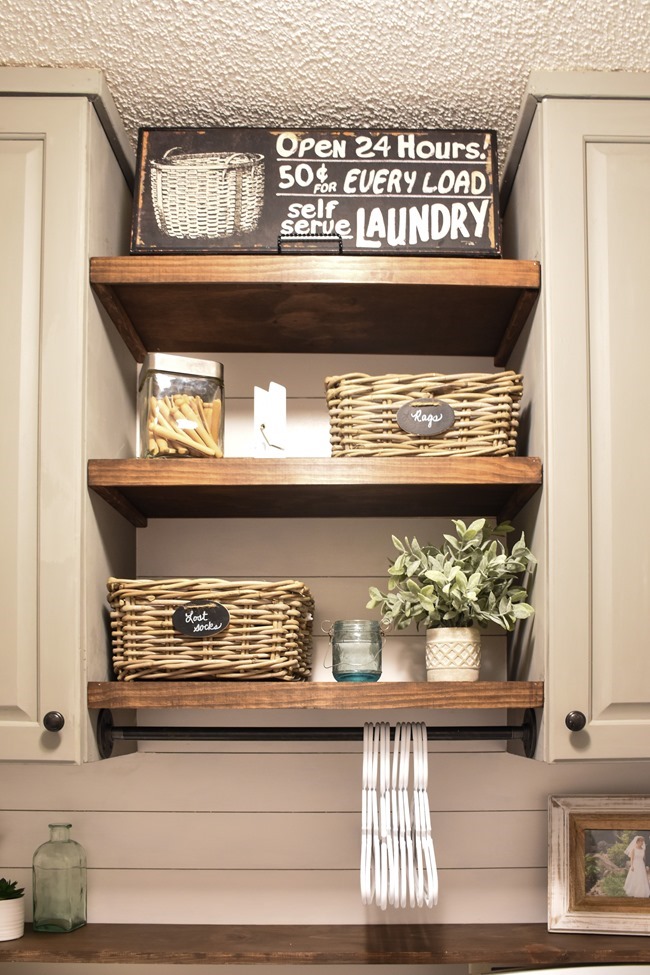
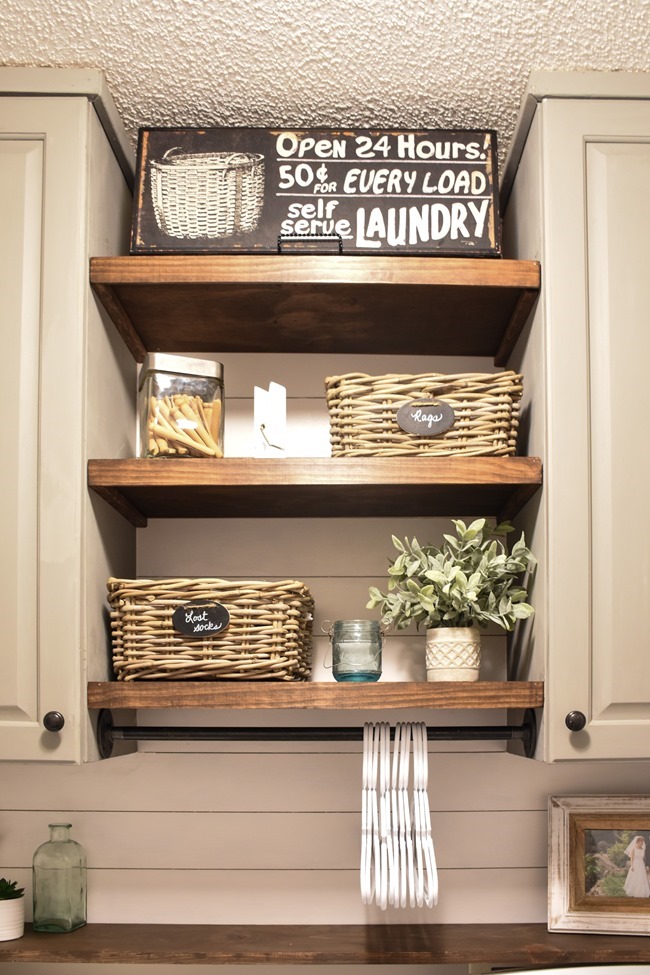
I created the shelves in between the cabinets by using a scrap piece of plywood we had in the garage. We just added some free/roadside finds cabinets in garage for workspace and bought a big sheet of plywood for countertops – this was just the leftover strip off the back. Then I ripped down a 1×2 board in half to create 1×1 inch pieces I could use as supports. Sanded and stained it all Dark Walnut by Varathane and nailed the supports to the cabinet and set shelves on top.

To create a finished edge I used a pine piece of lattice (found in trim section) and nailed it to the front. I love how this covers it all up and makes the shelves look thick and chunky!

The hanging rod is created with plumbing hardware found at Home Depot – 2 flanges screwed into the cabinets with a 24 inch pipe in between. I love that rustic/industrial look that the plumbing hardware adds!

Oh and the sign! I saw this type sign all over online – I think there was something like this in a Fixer Upper episode – and I knew I wanted a black Laundry Co. sign in our laundry room. ![]() I followed this same method I used to create this Christmas sign (designed wording in Picmonkey, stretched to several pages in Paint, printed, transferred to board and then painted). And because I was being super cautious with my budget I painted this sign on the back of this “First Day to School” chalkboard I made a few years back and just framed it with a stained 1×2 board. Now if I can just remember that back to school chalkboard is hiding back there when I got to look for it! I am really trying to make all of my signs double-sided – less to store seasonally and cheaper too cause you get 2 looks out of 1 board.
I followed this same method I used to create this Christmas sign (designed wording in Picmonkey, stretched to several pages in Paint, printed, transferred to board and then painted). And because I was being super cautious with my budget I painted this sign on the back of this “First Day to School” chalkboard I made a few years back and just framed it with a stained 1×2 board. Now if I can just remember that back to school chalkboard is hiding back there when I got to look for it! I am really trying to make all of my signs double-sided – less to store seasonally and cheaper too cause you get 2 looks out of 1 board.
The plug is hiding behind this picture which I love! Perfectly accessible but out of sight.

And then I just had to decorate! I know some of you may say I have way too many accessories or what’s the point in a laundry room but I figure why not make it functional AND pretty? I gained all kinds of hidden storage to hide all the not-so-pretty stuff so that’s where all that is. Before only the stuff on the 2 lower shelves was stored on the 1 wire shelf. Now I have 2 more shelves to store paper products which I desperately needed!

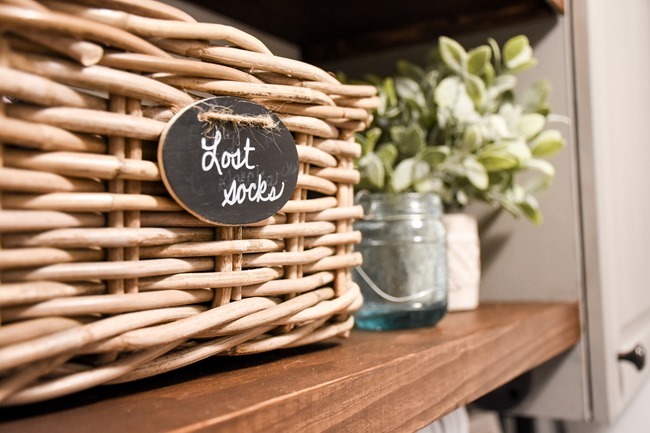
I do have some functional things out in the open – a basket for lost socks, another basket for rags, and little jar for loose change or buttons.
The black and white sign on the top was in my laundry room at my last house (think it came from Hobby Lobby originally), I picked up the old wood clothespins for $0.75 at a yard sale and saved for this laundry room makeover, the baskets came from my stash (the other ones were a bit too big for the shelves so I’ll reuse someplace else), and the little plant came from TJMaxx.
I had that metal Laundry hook in here before. I use to hang things to dry.
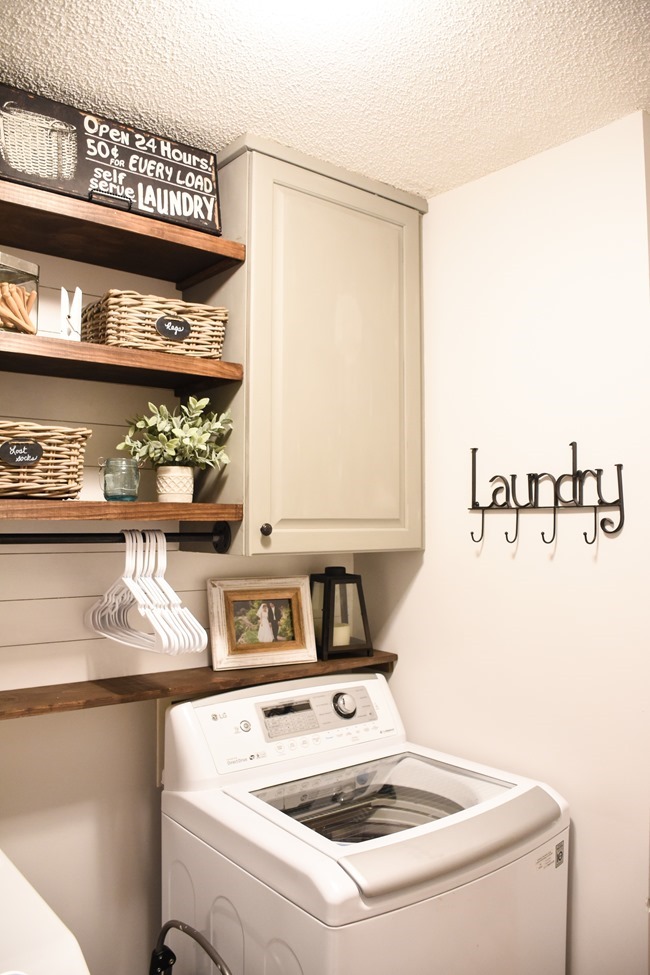
And for those of you wondering if you followed from the beginning, I’ll show you the rest of the room. My plan this month was just to tackle this laundry corner of the room – the rest of the long hallway will serve as sort of a mudroom and I’ll tackle it hopefully in a few weeks. I am currently looking for 2 cabinets I can stack or a cabinet unit that I can put in between that electrical box and the corner to serve as extra pantry/storage space. Then I need some way to disguise that box? Maybe paint same color as wall would help? And then along the wall on the left I will add some sort of trim and hooks for coat/bookbag storage and a bench below.

I am just loving my laundry room though – it makes me smile when I go in there now! ![]()


I love having the lamp in here (just my choice) – I always am changing out and starting another load of laundry at night and I love going in here with lamp light on. ![]()

One more before/after…
Before –

And after!

And now for the budget breakdown:
- paint for walls + cabinets, stain – already had
- cabinets – $45 from Restore (I just spray painted the knobs with ORB spray paint I had on hand)
- storage bins for inside cabinets – $4.90 ($0.98 each from Walmart)
- shiplap – leftover from nursery
- long shelf above washer – $9.56 (1x8x6 board –$8.34, 1×2 board for supports- $1.22)
- shelves between cabinets – $5.07 (plywood leftover from other project, pine lattice $5.07, 1×2 board left from long shelf)
- hanging bar – $16.92 (flanges – $9.70, bar – $7.22)
- trim for top of cabinets – $1.22 (1×2 board)
- rug – $9.99 from TJMaxx
- plant – $4.99 from TJMaxx
- wood clothespins – $0.75 from yard sale
- sign – $1.22 (reused back of old sign, trimmed with 1×2 board, paint had already)
- rest of decor – already had or reused from room before
Total: $99.62!
(I was seriously thinking I would be over on this room! But then I found that old sign I could reuse and I would have returned the plant if I had to – but I came in just under budget with pennies to spare! ![]() )
)
I know some may think – well, you had paint and other stuff already – and I realize that. But the thing about this challenge is to get you to look around and find things you could use that you already have – like that sign, or use cheap 1×2 trim to trim out top of cabinets instead of crown molding (truth is I stink at doing crown molding so that was my easy way out ![]() ) and seeing those strips of shiplap just sitting in garage that I was able to clean out and use. Maybe you have half a gallon of paint leftover from a bathroom you could use? Challenge yourself to use things you have and you’ll be amazed how low you can keep your budget.
) and seeing those strips of shiplap just sitting in garage that I was able to clean out and use. Maybe you have half a gallon of paint leftover from a bathroom you could use? Challenge yourself to use things you have and you’ll be amazed how low you can keep your budget.

Check out the rest of the One Month, One Room, $100 challenge room reveal makeovers below – seriously just amazing!
This turned out SO good! I am getting ready to redo my laundry room and I am feeling extra inspired by some of these fab makeovers in this challenge. Shiplap might be in my plans even though it wasn’t before. It just looks fab.
This turned out so great!!! Love everything you did!
Just so beautiful! and I really like it. Inspiring and motivating for me. 😀
Oh. My. Goodness!!! This is simply incredible! You have such amazing reveals, and this laundry room is no exception. It turned out beautifully. So nice to add the cabinets for extra storage, and the light is such a great idea. It makes the room look even cozier. Thanks so much for participating in another round of the challenge!
Love your laundry room, wish i had one. My washer an dryer are in the garage right next to the electric panel an the water heater, there is no way to put shelves or having them in more then one way sitting there so that you can get in to the water heater an panel, really love your, it is beautiful
Wow, the cupboards & the shelf make a huge difference!! I love your color choices also! Great job & under $100!!
Beautiful! I love a pretty and functional laundry room and yours is gorgeous! Looking forward to seeing what you do with the rest of the hallway.
I admire your energy and your creative vision for your laundry room! This makes a mundane job much more enjoyable!
Oh my gosh I am amazed at how much you were able to do for such a small budget! This looks amazing, and I love all of the little touches that you added!
You did a really really NICE job!!!!! I think you should win the challenge
I just redid my laundry room because we installed B-Dry system in our basement. Now I have a craft room in my laundry room!!! I wish I would have taken pictures, as it is so nice now. We have new flooring, and lots of new shelves and a new cabinet with a new sink. I love to go down there now!!!
Love the shelves and the shiplap!
You did a really wonderful job with your laundry room! So creative!
Technical question (I’m a new diy-er)-on your shiplap walls you put up the boards and then painted them. Do you find it easier this way-does the paint not get messed up this way?
Thanks for sharing your makeover.
Wow! The before and after of this space is amazing! How nice to have the cabinets now for all that storage. and the shelves are so pretty!!
I love this makeover. Your laundry is beautiful. I especially love your fun signs. Great job!
Wow! The transformation of this laundry room is absolutely amazing! I love the addition of the cabinets and the color is perfection!
Your laundry room is gorgeous! I love those signs!
This is a gorgeous laundry room! That shiplap and shelves are so pretty and I love that you added a little lamp for soft lighting. I would love to laundry in here!
Such good ideas! I want to do my laundry room too and I’m planning on doing something similar. I already have the cabinets but love the shelves between them, plus the shelf above the washer and dryer. Saving this to favorites to show my husband, thanks for the inspiration!
Your laundry makeover is fantastic! I’ve been bookmarking ideas to hopefully tackle our laundry room later this year. We have a similar situation with a useless wire shelf as our only storage; I love how much storage you were able to add with the cabinets, open shelves & hanging bar!
WOW! You did an amazing job. It looks sooo good. I can hardly believe how much different it looks. I love the shelves and the cabinets.
Great rusty vibe! I love it! I was wondering if you are planning to create a tutorial for the sign. it is spectacular!
Wow! This is one of my favorite transformations. It’s such a gorgeous room now and I love the shiplap and those cabinets!! I think your Laundry sign is one of the best parts – it looks perfect! You did an amazing job and I’d be happy to do laundry in here!
I love this room! Your projects always remind me that I can make changes without breaking the bank. I appreciate that.
This turned out SO amazing! The shiplap just took the room to a whole new level – it looks so high end and custom. Gorgeous job – I’m taking notes for my upcoming laundry closet makeover!
Wowza! This laundry room is amazing! I love the cabinets and the SHELVES! So pretty- you’re right, everything just looks like it was made to be in that room! You did such a great job for this challenge AND came in under budget! Incredible! Love every little detail!
I love everything you did here, absolutely sweet. Having put significant funds into my kitchen and bathroom I’ve been looking for inexpensive DIY ideas for the basement laundry room. Where did you get the cute basket tags?
I’m undertaking a similar mudroom project what is the height of the ceiling in that room? And what is the height and depth of the cabinets along with the attic crown molding? Do you feel that you have enough clearance when you open the lid? Also, do you find that you can reach the lower shelf easily? It would be very helpful for me only because I’ve had so many people tell me that I need it bigger cabinets, taller cabinets not to mount them at the ceiling, which I do not care for the lowered Cabinet due to the fact it causes causes a problem when you go to change the paint color and you have such a small area above the cabinets to try to paint.