This post is sponsored by The Home Depot.
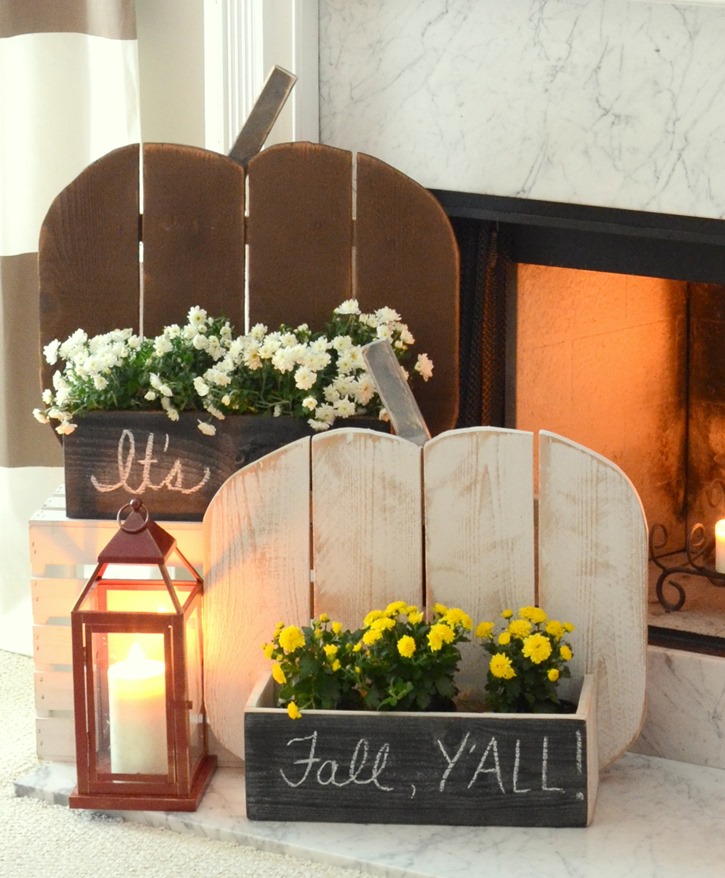
I am SO excited to share not only a FALL project with you but a wood building project as well with you today. Can we just talk about how ADORABLE these wood pumpkins are? And YOU can make them for you home too!

I built two of these pumpkins but I am going to list the materials for making one – so just double that if you want to make two as well.
Materials needed:
- 1 – 1×2 – 4 foot long (if you buy a 8 foot long 1×2 – you can use it to make two projects)
- 2 – 72” long x 5 1/2 wide cedar fence pickets
- 1” staples
- exterior wood glue
- tools – measuring tape, saw (circular or miter), Jig Saw, Ryobi Airstrike Crown Stapler, clamps
- paint and/or stain of your desired color and preference
- sanding block or sander

For the pumpkin, cut your cedar fence pickets into 4 – 18” pieces and the 1×2 into 2 – 20” pieces for the braces and 1 – 8” long piece for the stem. For the box you will need to cut a cedar fence piece into 1 – 17” long piece, 2 – 5 1/2” long pieces, and 1 – 16” long piece. Of course all of this can be adjusted – want to make it smaller or larger just adjust the measurements to fit your needs.
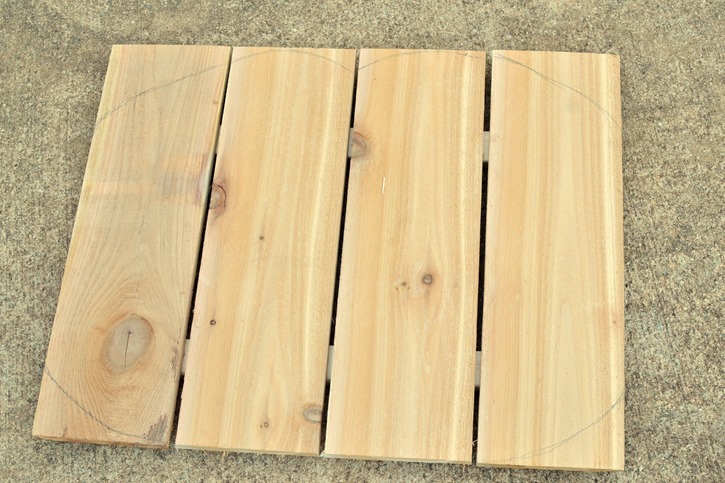
I laid out the 18” long picket pieces and secured the 1×2 pieces on the back using wood glue and my staple gun making sure to leave space in between each board.

Flip it over and now is the time to draw out your pumpkin shape. I was a bit nervous about this as I am NO artist – but just draw it out with pencil making the bottom a bit heavier than the top. Use a jigsaw to cut the shape out. This doesn’t have to be perfect – the fun part is this makes every pumpkin unique (which every real pumpkin is shaped totally different too!)
Then secure the small 1×2 piece on the back with wood glue and staples for the stem. Be creative! Want to make it longer/shorter/use a stick as the stem – go for it!

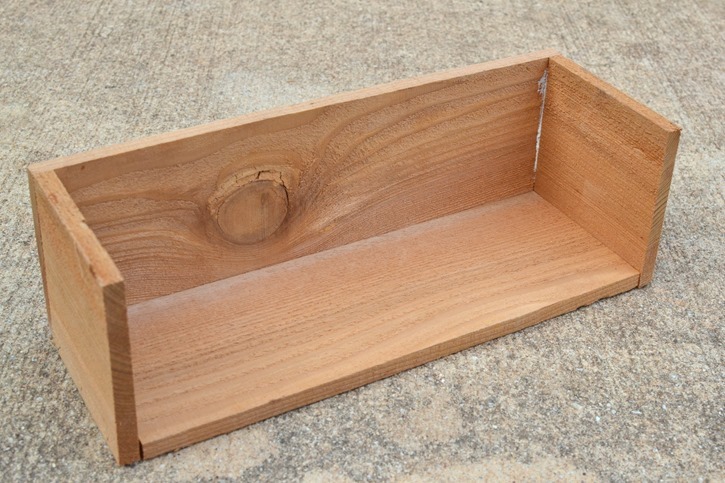
Then it is time to make the box. The 16” piece is on the bottom, the 17” piece is on the outside, and the 5 1/2” pieces make up both sides. Make sure to use wood glue and then secure with staples. An then secure the entire box to your pumpkin making sure to line it up with the bottom edge (it’s ok if the corner overlap the rounded pumpkin shape).
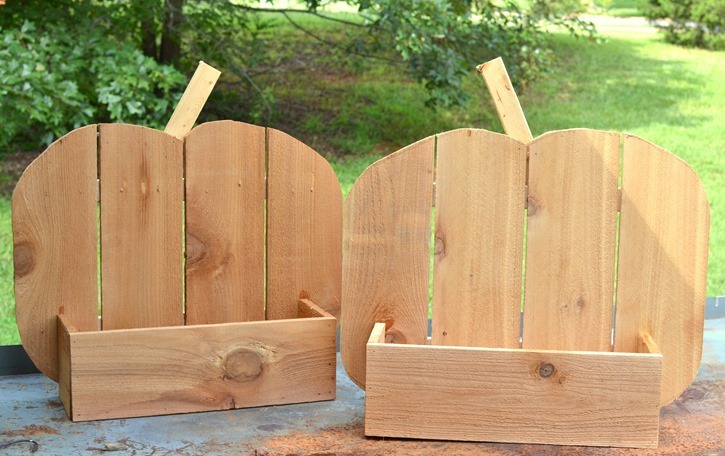
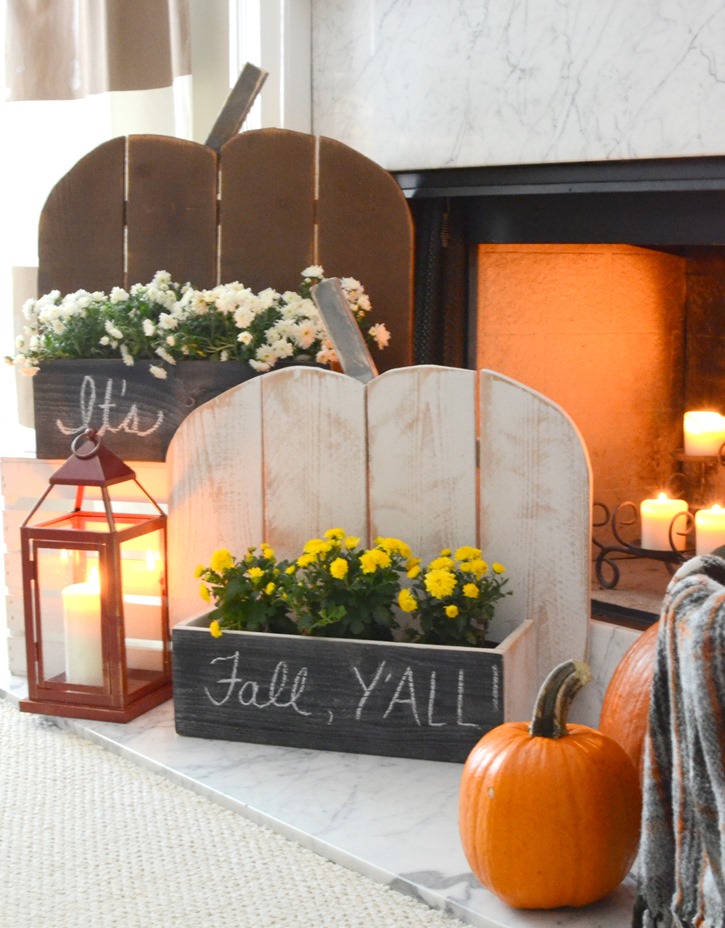
So here are my finished builtpumpkins – I sanded the edges a bit especially where I cut out the pumpkin shape and gave the stem a bit of a rounded look as well. Then comes the fun part because you can customize them with paint, stain, leave them natural – do whatever fits your home/décor and how you want to use them! Will you use them as treat boxes on your porch on Halloween? Then maybe you want to do black pumpkins with polka dots! Are you wanting to make a Harvest/Thanksgiving display on your porch to greet your guests – then maybe you want to just paint them the traditional orange or white color.
This is how I customized mine – I used Varathane Weathered Gray and Early American wood stain, Rustoleum Chalked paint in Linen White, and Rustoleum chalkboard paint.
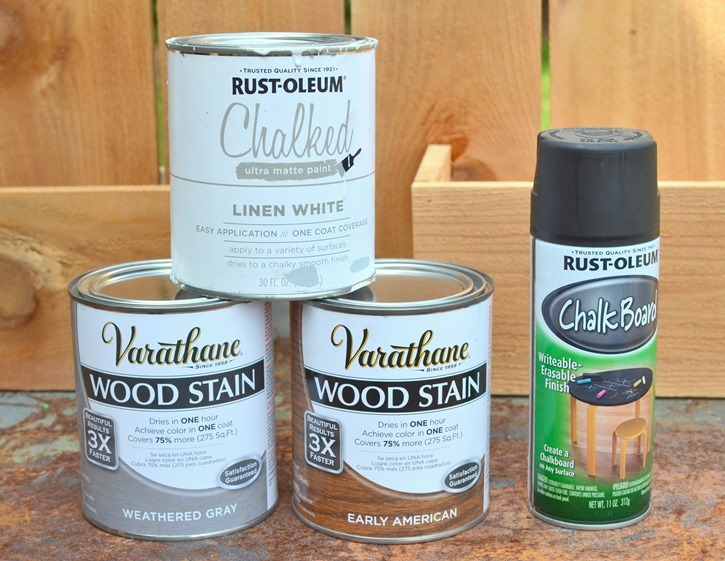
I spray painted the front of the boxes with the chalkboard paint (you could also use the brush on chalkboard paint, I just had the spray paint version on hand). And then I stained one pumpkin with the Early American stain, painted the other one with the Chalked white paint , and stained both of the stems with the Weathered Gray stain. Once they were dry I heavily distressed the white pumpkin with my Ryobi orbital sander and also lightly distressed the stained pumpkin as well. Again totally personal preference but I think distressing the white pumpkin completely changed the look and I love it.

I am using mine inside in my living room on my hearth as part of my mantel display. Filled with fresh mums they just scream fall to me. But I can totally see using these on my porch as well and they may end up there before end of the season. You could store magazines in them, fill them with fall filler of leaves and acorns and such and candles (the battery operated ones to be safe), fill it with small gourds or pumpkins – the possibilities are truly endless!

I love the chalkboards on the front and they can be used and reused to write any kind of message I want on them.

So how you would you like to see a live demonstration of how to make these DIY Rustic Wood Pumpkin Stands and even get in a bit of the action yourself!? Well lucky for you can THIS Thursday evening (Thursday, September 17th at 6:30 pm) at a Home Depot store near you – click here to register (it’s completely free!).
Have questions, not sure how to use a jigsaw, never worked with wood? The Home Depot’s Workshops are designed to provide a mix of associate-led instruction, demonstration, and some hands-on learning. Attend the DIH workshop where you can ask questions, get hands-on experience with the materials and tools, learn new skills, and go home with a worksheet of step-by-step instructions. Materials can be purchased while you are there to make your own at home (if the 8 foot piece won’t fit in your car Home Depot can cut that down for you). Maybe find a friend that you know would LOVE to learn how to make these as well and have a fun girls night out! I took my 8 year old niece with me last month to the DIH workshop near me and we had a fun night together and learned how to build a decorative wall shelf.
The Home Depot offers free workshops at all of their locations for do-it-yourself-ers of all ages and experience levels. You may have seen these workshops on a board at the front of the store but not really paid attention to it.
There are 3 different types of workshops offered:
- Do-It-Yourself (DIY) – like how to install tile, easy home repair projects, learning about tools, and more
- Do-It-Herself (DIH) – held monthly on Thursday evenings and focus a bit more on home décor projects like this project
- and fun kids workshops too!
You can always visit http://workshops.homedepot.com to learn more and check out what workshops are coming up next. To register for this particular workshop to learn how to make a DIY rustic wood pumpkin click here.
Here’s just a quick sneak peak of my entire fall mantel!! ![]() I went way different this year with it than in past years and I LOVE it. There are actually two wood building projects in this mantel display because I built those wood farmhouse shutters as well! I will share the full tutorial on how I made those on Wednesday along with a full mantel post with details then too.
I went way different this year with it than in past years and I LOVE it. There are actually two wood building projects in this mantel display because I built those wood farmhouse shutters as well! I will share the full tutorial on how I made those on Wednesday along with a full mantel post with details then too.

A few of us bloggers sort of had a virtual DIY Rustic Wood Pumpkin party (because why not? ![]() ) and all built pumpkins and displayed them in and outside our home! They are all different and customized how we felt they best fit our homes and styles so have fun looking at them and getting inspired by some of the other ways that others used them in their home.
) and all built pumpkins and displayed them in and outside our home! They are all different and customized how we felt they best fit our homes and styles so have fun looking at them and getting inspired by some of the other ways that others used them in their home.
Outdoors
- Domestically Speaking
- Redhead Can Decorate
- My Uncommon Slice of Suburbia
- Setting for Four
- Little Red Brick House
Kitchen
Guest Room
Living Room
- DIY on the Cheap
- The Frugal Homemaker (me!)
- Dogs Don’t Eat Pizza
- Just a Girl and Her Blog
- Maison de Pax
Dining Room
I would LOVE to hear if you attend the workshop on Thursday night at your local Home Depot and if you decide to make your own Rustic Wood Pumpkins Stands – please share pictures with me over on facebook. My nieces and nephew have convinced me to help them build their OWN pumpkins and get to paint them so we plan to have fun with that this week! I’ll be sure to share pictures of those over on Instagram or Facebook as well.
I acknowledge that The Home Depot is partnering with me to participate in this Workshops Program (the “Program”). As a part of the Program, I am receiving compensation in the form of products and services, for the purpose of promoting The Home Depot. All expressed opinions and experiences are my own words. My post complies with the Word Of Mouth Marketing Association (WOMMA) Ethics Code and applicable Federal Trade Commission guidelines.
Love it! You did a great job. And I agree, mums = fall!
I love your mantle. Wish you could actually make these at Home Depot during the demo. Probably a big liability hazard!! You know they think most of us don’t have a clue around tools.
Your entire mantel looks so beautiful decorated for fall. The two pumpkins together really look great. And I’m with you…the white paint looks best distressed 🙂
Fall is totally your season – your mantel and home always looks gorgeous, but especially in fall. Love the decor and how you used the pumpkin stand!
I just love those with your mantel all decorated for fall! Chalkboard is the best, I swear! Also love your new shutters!
I am loving your mantle and wooden pumkins!!! So perfect. 🙂
Have a wonderful week!
Sherri