I have a BIG makeover I am excited to share with you today! This is step 2 + 3 of our kitchen makeover so these aren’t the final hopefully on e day finished pictures, but wow did this step change it so much!

So here’s what our kitchen looked like at the beginning of May.
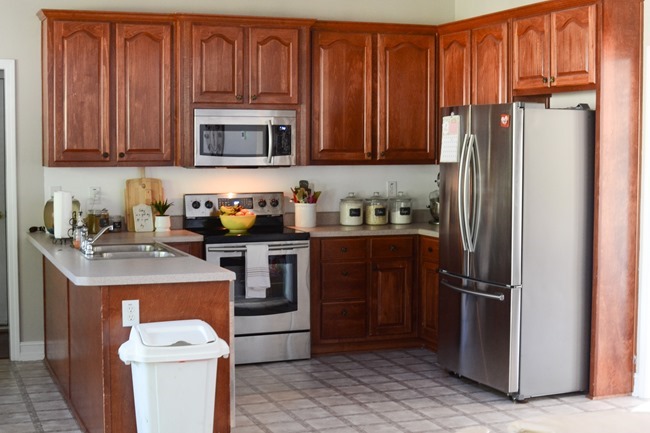
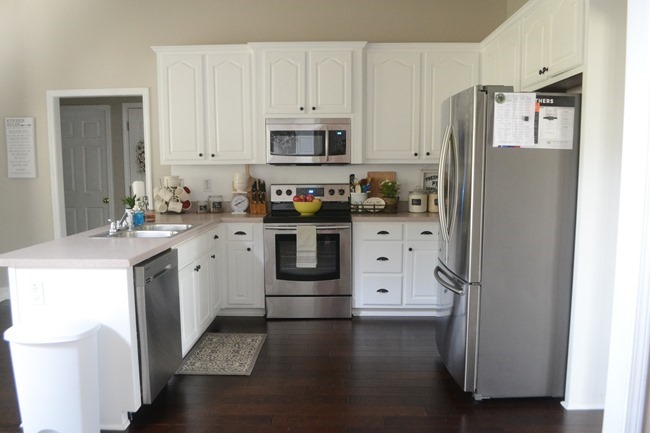
And here’s the way it looked by mid- June. ![]()

Once again before.
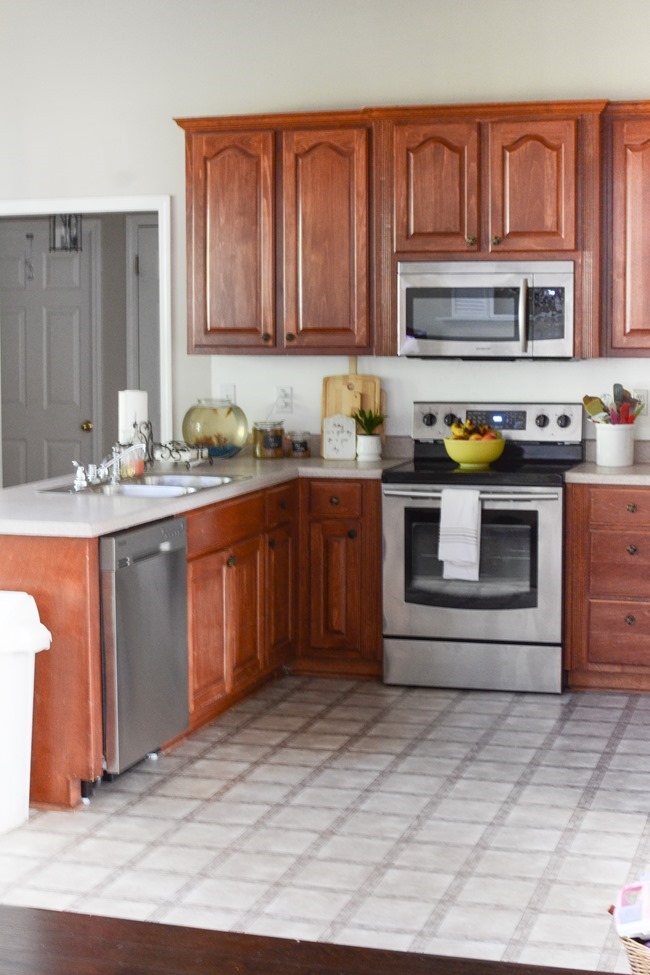
And after!

And one more from this angle.
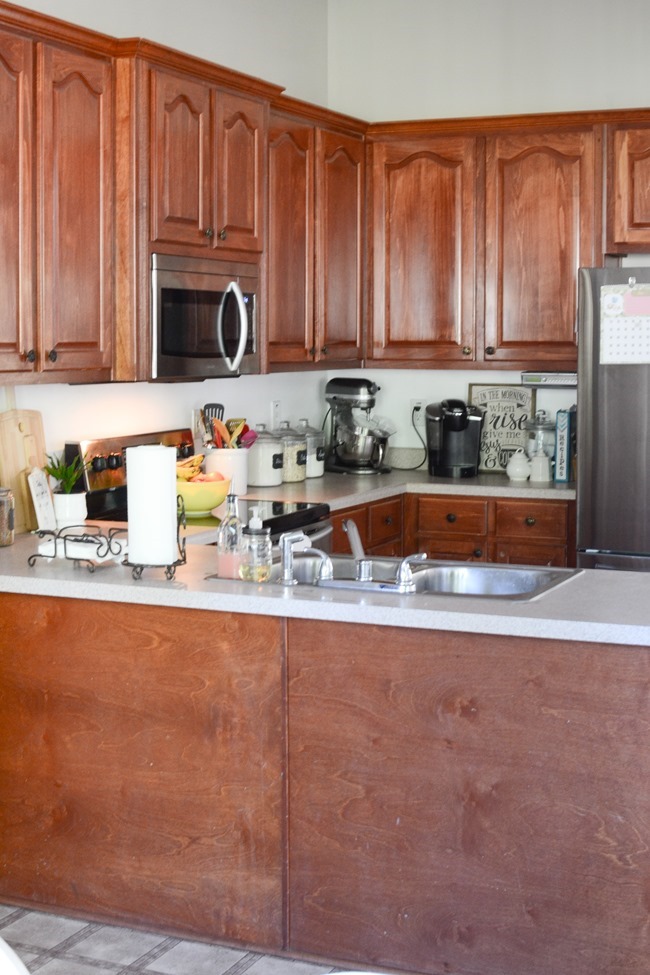
And now! ![]()

So let’s first go back and look at the true before when we moved in last year to how it looks now and then I’ll share the full details on how I painted the cabinets.
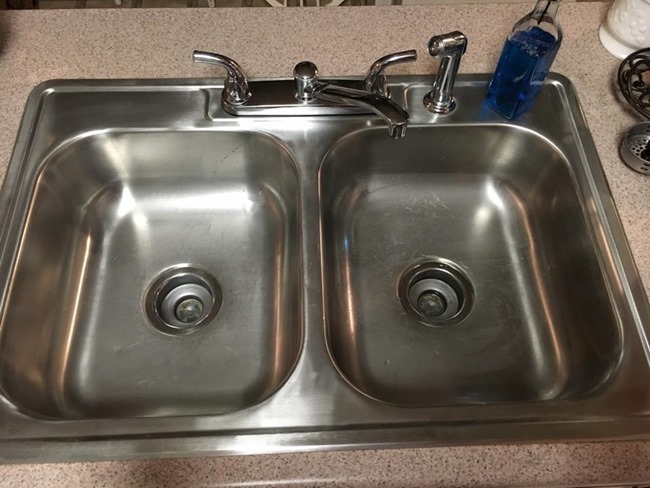
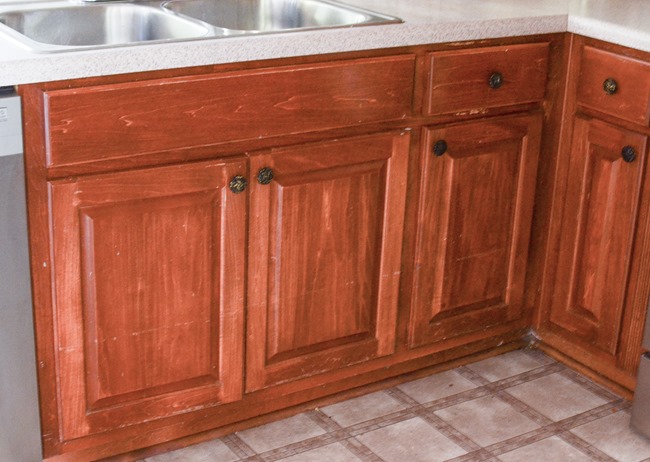
Here’s how the kitchen looked when we moved in. The faucet leaked and the sink was burnt and stained so we put in a temporary free facebook yard sale sink/faucet until we replace it later down the line.

The old fridge was so small (and so nasty!) and we really wanted to replace them all so I snagged an amazing deal at Home Depot last November on during Black Friday sale stacking several discounts, free delivery, gift cards and more to get this matching set of base line stainless appliances.
I also painted the walls to match all the main areas of our home – Behr Wheat Bread. And on a whim one day when I just felt I was drowning in brown I grabbed a paintbrush and painted the tan/pinkish laminate backsplash with some white paint. At least I had something white in the kitchen for a few months until I was able to tackle painting the cabinets.

Now onto why and how we decided to paint the cabinets. We initially moved in undecided on whether we would paint them or not, and if we did unsure of what color we would do. I knew that ultimately if nothing else worked we could definitely paint them but we did consider other options too. So we lived with it for a while until we could decide. They definitely needed some work as the previous owners had pets and the lowers were quite scratched and scraped. Then we had to decide on flooring. We debated going with tile in the kitchen but ultimately after living with several types of flooring (the old linoleum in the kitchen and the new engineered wood we had installed in the living room/main areas) and the very open floor plan we really thought one continuous flooring would look best. And that was one of the best decisions we made – love the continuous dark wood flooring! So once we decided we wanted the same dark wood in the kitchen, I knew keeping the current wood color cabinets was out. I am just not a fan of different colors/types of wood and that would have been way too dark for my light-loving self. We considered doing gray cabinets but I wonder if that trend is here to stay and honestly I just love a classic white kitchen. So white it was!
I had heard about Joanna’s Magnolia Home line of paint through Kilz and really wanted to try it. Turns out on my local Ace Hardware stores carries their paint line in store so I picked up a gallon of True White Trim/Cabinetry paint – her cabinetry line paint only comes in 2 white colors already mixed straight off the shelf. I am a big fan of Behr paint which is partnered with Kilz so I was pretty confident I would like this line (and I do!) By the way none of this post is sponsored – I paid for the paint, primer, and new hardware out of pocket.

Now onto the painting process. I will say painting over brown wood cabinets was a much longer/harder process than repainting white cabinets. If you have white cabinets that are damaged, just need to be repainted, or maybe you want to paint a different color – see the full process of how I did that at my previous house.
Materials needed:
- primer – I used Kilz primer
- paint – Magnolia True White cabinetry paint
- high quality paintbrush – Wooster or Purdy
- small rollers – either foam rollers or fine roller
Step 1 – remove all the cabinet doors and label them! I stuck a numbered piece of table in the hinge hole.

Step 2 – clean cabinets and doors well.
I used a degreaser to clean all cabinet frames and doors well.
Step 3 – fill holes (if needed)
I was changing my drawer hardware from one knob to pulls that needed 2 holes so I filled the holes with wood putty, let dry, and then sanded smooth. Also any large knicks/scratches I also filled and sanded smooth.

Step 4 – sand. Yes, you need to sand. Not down to the original wood, just sand enough to smooth any scratches and rough the surface to prepare for paint. I lightly sanded the upper doors and sanded the lower ones a bit more since they had scratches.
Step 5 – prime.
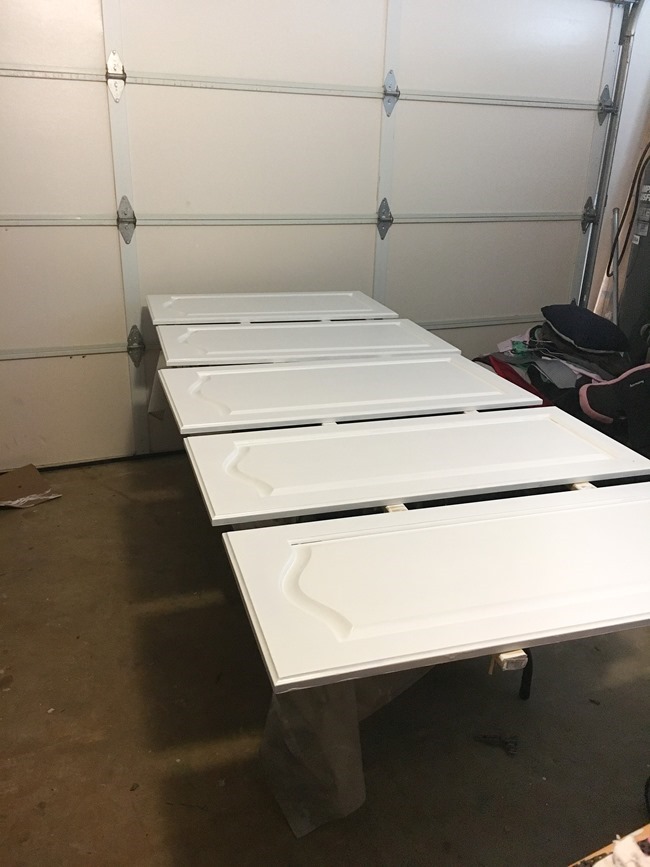
I did 2 coats of primer on everything. Since you end up spending so much time waiting on dry time I found it easier to work on several things at once. I primed the back of the lower cabinet doors one coat, then primed all the cabinet boxes, and then did a second coat on the back of the doors one evening. Then the next day/evening I did a second coat of primer on the back of doors and the second coat on boxes, next I flipped doors and did 1 coat of primer, and moved on to paint on cabinet boxes. And so on. So the cabinet boxes were done first, then the lower doors, then the upper doors. I painted all the door laid out in the garage.
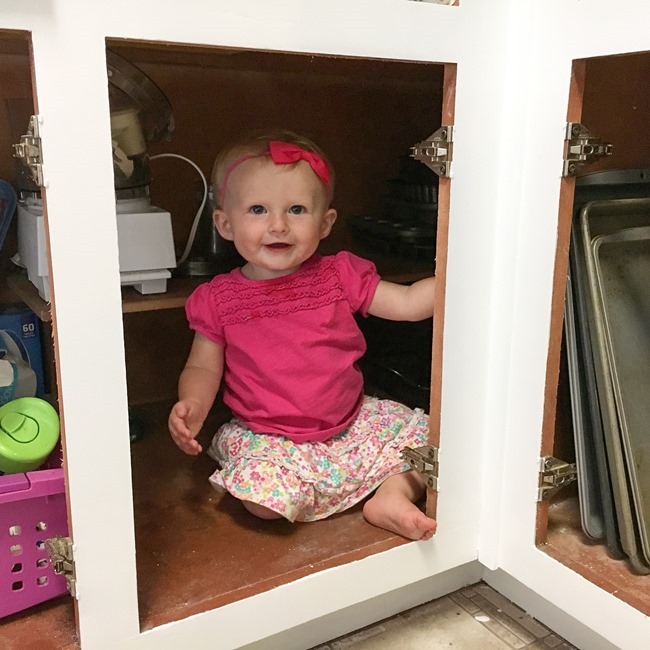
And my little girl had all kinds of fun playing in the open cabinets while mommy worked ![]() As you can see from this picture I only painted the front of the cabinet boxes and didn’t paint the inside frame or inside the cabinet. But I did paint the back and front of each door.
As you can see from this picture I only painted the front of the cabinet boxes and didn’t paint the inside frame or inside the cabinet. But I did paint the back and front of each door.
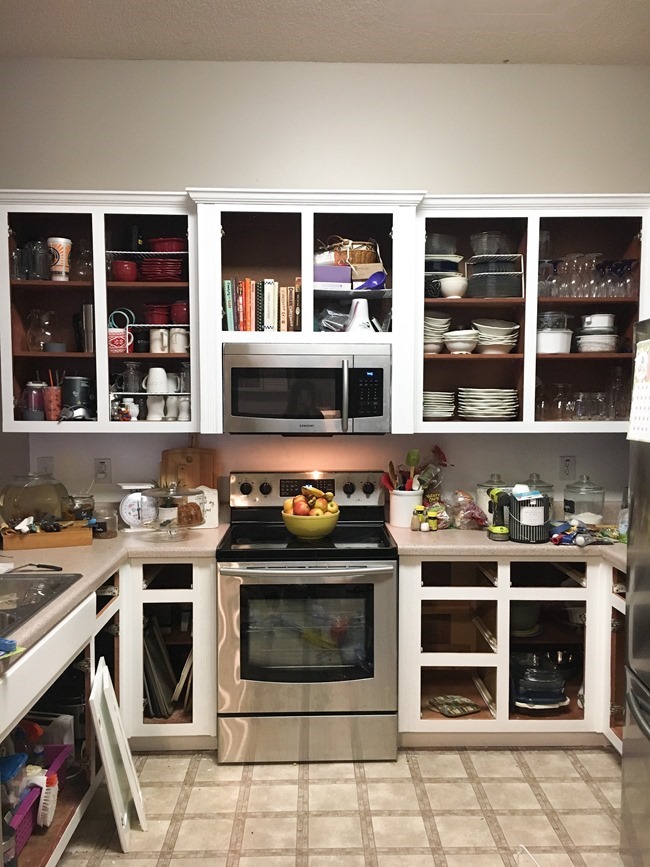
My kitchen looked like this for about 10 days. But I was so glad I could tackle this before we had the flooring installed in the kitchen so I didn’t have to be super careful about getting paint on the floor ![]()
Step 6 – paint.
I’ve already explained this some but I did 2 coats of primer and 2 coats of paint on the cabinet boxes. And then did 2 coats of primer on the back of doors, flipped, 2 coats of primer on the front of doors, flipped, 2 coats of paint on the back of doors, flipped, 2 coats of paint on the front of doors. Starting with back and ending with front protects the front from getting any marks. Follow the dry time on the can (I sometimes cheat a little but do try to stick close to the dry time) for your primer and paint. I also added just a bit of Floetrol in the paint especially when I was doing the doors just to try to get a smoother finish and have a bit longer to work with the paint.
Once everything was primed and painted I let everything sit and cure for several days.
Step 7 – reassemble + add new hardware
Finally, it was time to put the kitchen back together! Carefully reinstall all the doors which is easy if you label them! ![]()
I also updated my hardware with some fabulous new hardware from my D. Lawless Hardware! ![]()
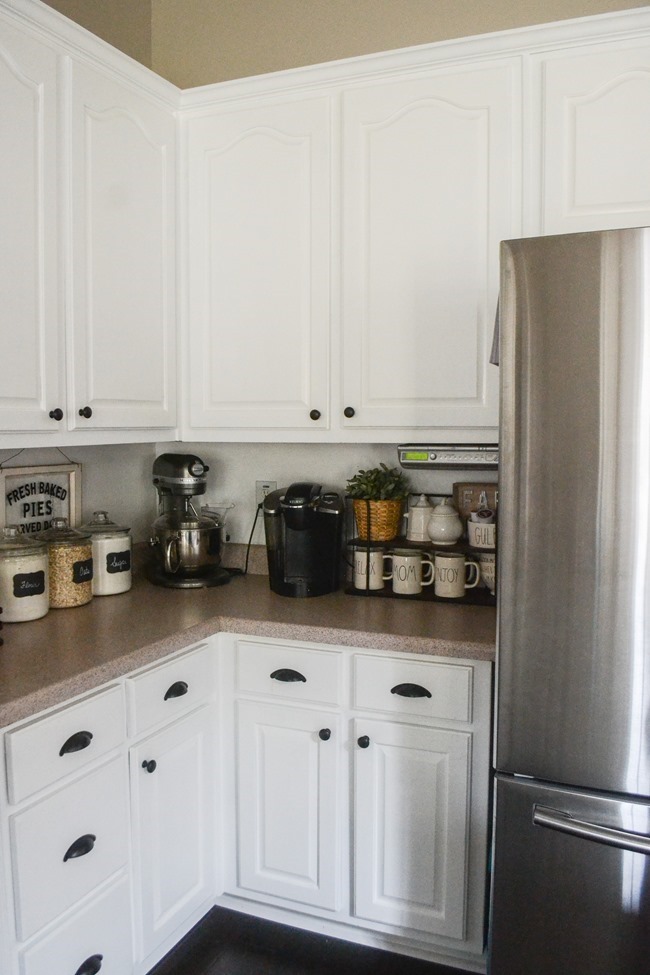
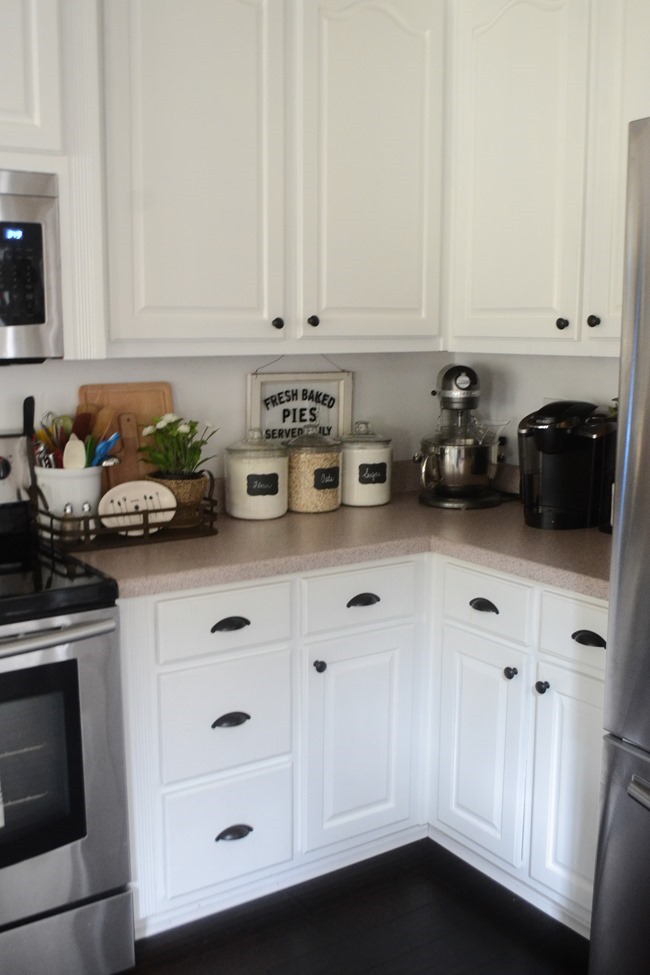
The knobs are Oil Rubbed Bronze Country Store Knobs and the pulls are the Oil Rubbed Bronze Country Store Cup Pulls. I love the simple/farmhouse style and you just can’t beat new hardware for your entire kitchen for less than $40!
Here’s a closeup before
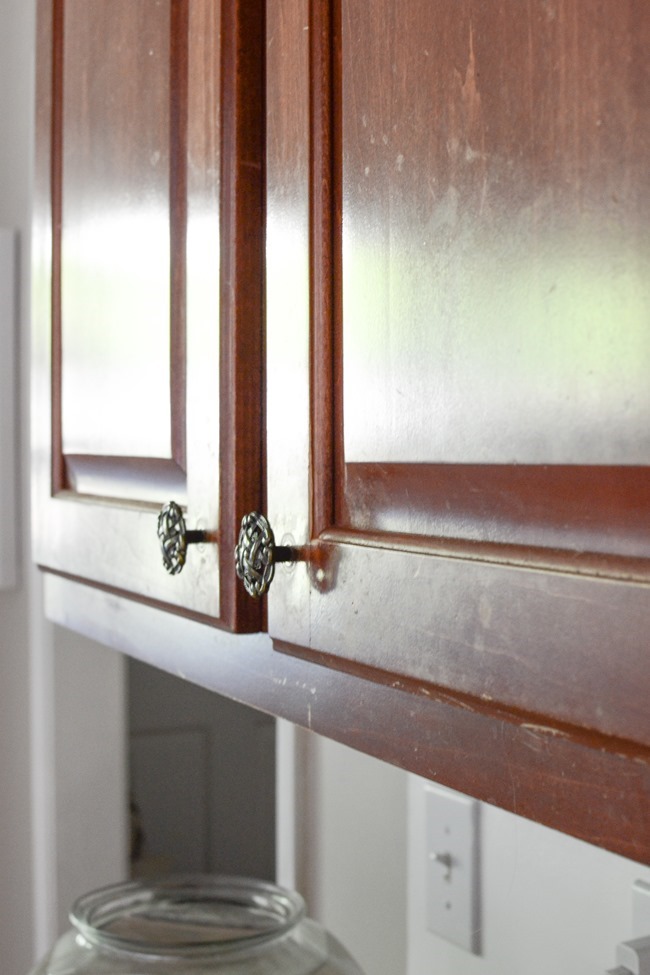
and after!
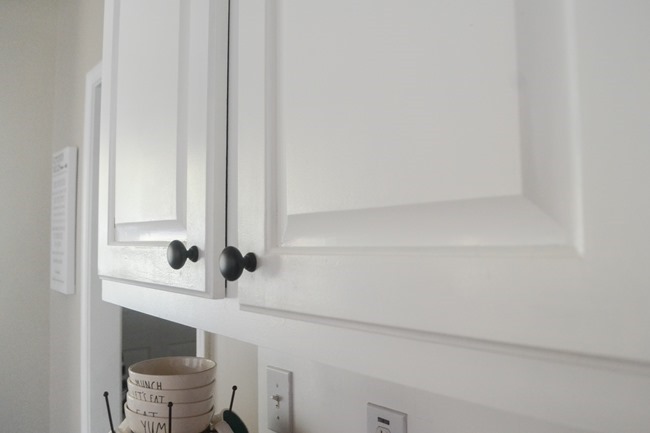
Now I have lived with them for about 5 months so here’s my review of the paint – the cabinets wipe off easily, the paint has held up great, and they still look as good as the day I painted them. So would definitely recommend it and do it again!
And now just for some more pretty after pictures…



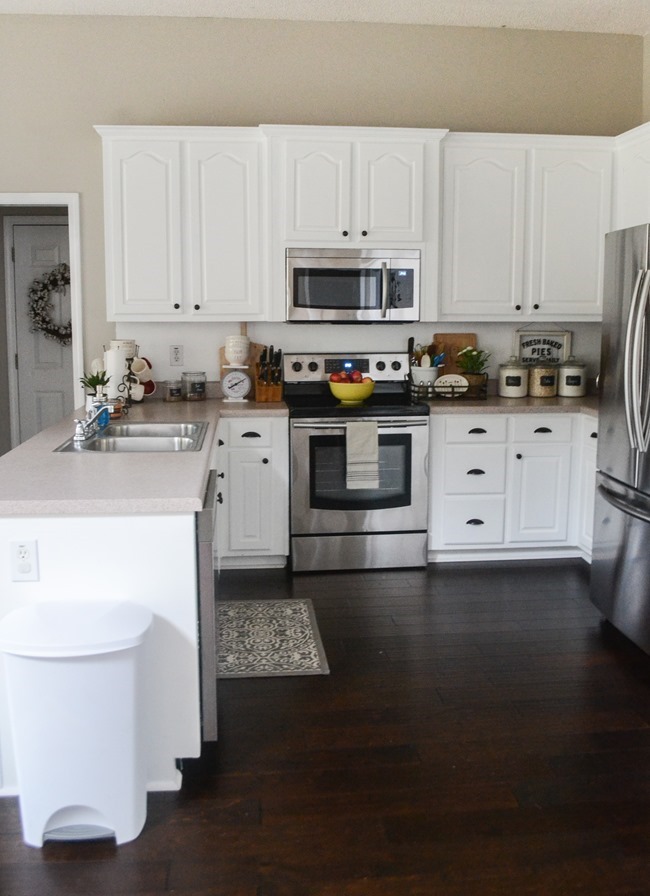
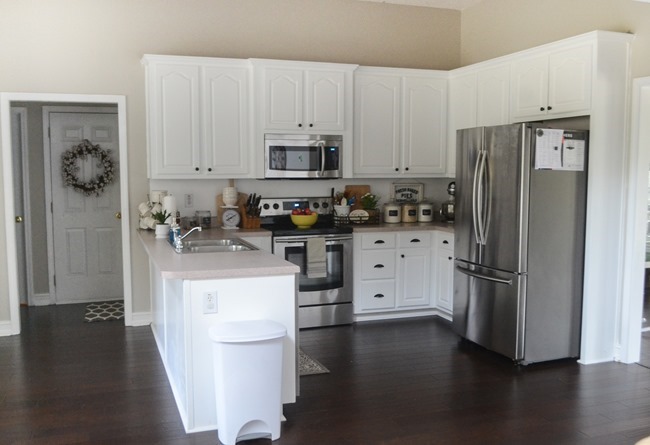
I am just in love with how it turned out! ![]() We have several other things we would like to tackle in here – new counters, install a backsplash, new sink and faucet, and possibly moving the cabinet above the fridge and building that out to create a more built-in fridge. But we will do that as budget and time allow – hopefully in this next year. I also have debated about moving the cabinet above the microwave up, and adding a faux panel in between the cabinet and microwave to create a raised cabinet but keep the microwave at the same level. Any thoughts on that? I’d also love to hear what you would do for counters and backsplash – we haven’t completely decided yet.
We have several other things we would like to tackle in here – new counters, install a backsplash, new sink and faucet, and possibly moving the cabinet above the fridge and building that out to create a more built-in fridge. But we will do that as budget and time allow – hopefully in this next year. I also have debated about moving the cabinet above the microwave up, and adding a faux panel in between the cabinet and microwave to create a raised cabinet but keep the microwave at the same level. Any thoughts on that? I’d also love to hear what you would do for counters and backsplash – we haven’t completely decided yet. ![]()
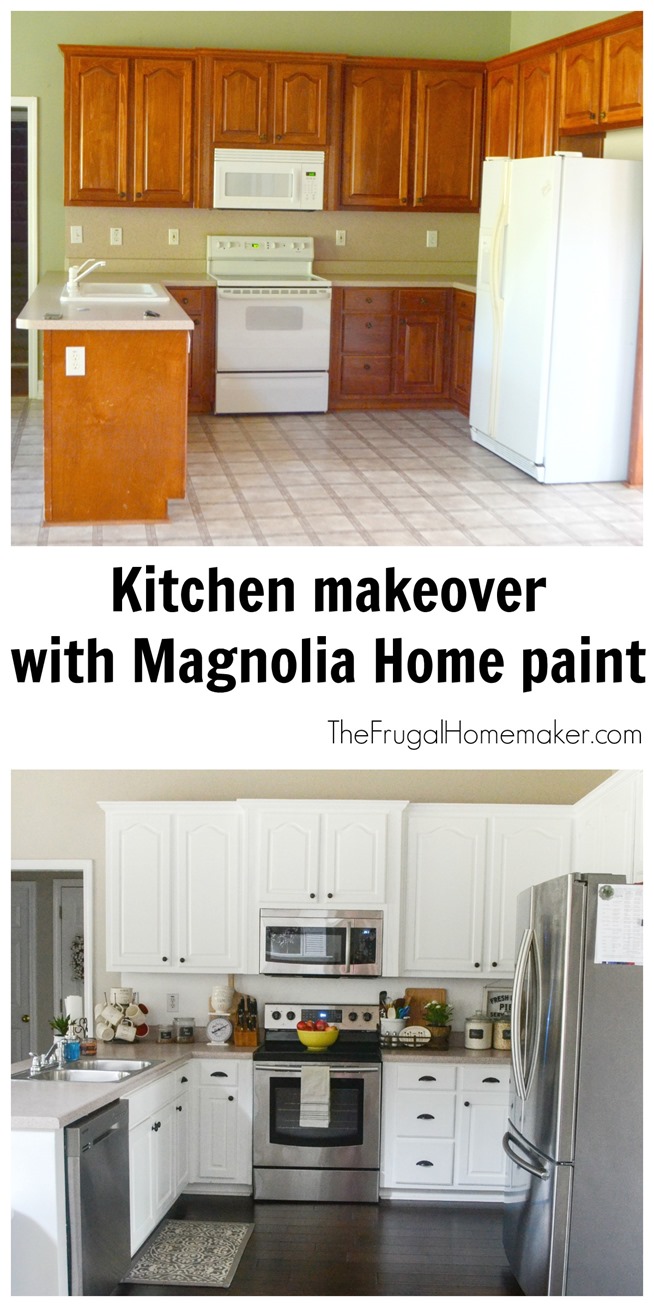
This was quite a big job, but definitely one that anyone can do. Take your time, don’t skip steps like sanding and priming, use a high-quality paint, and follow dry and cure time and it will turn out great. And you can save literally hundreds of dollars doing it yourself. This makeover came in right under $100 including primer, paint, and new hardware.
Have you painted or thought about painting your kitchen cabinets?
Nice job! Unfortunately the first thing that jumps out at me is the trash can. I’d suggest replacing it with a stainless steel one or find somewhere else to hide it. Otherwise it came out beautifully!
Oh my! What a lot of work, BUT WOW! Beautiful, clean and updated! Well done! Love it!
You did a wonderful job on your cupboards. Your kitchen looks so fresh and modern. The white cupboards are a nice contrast with your dark floor. Enjoy!
Looks beautiful! I love the white cabinets. Curious what you think after living with the dark floors for awhile. I love the look but find I sweep at least 2 times a day because EVERYTHING shows up! Wondered if I am the only one.
Looks so bright and fresh. I love the dark floors. Can’t wait to see what you go with for back splash. Wondering if you will go with subway tiles or something unusual like octagon., stay white/neutral. As far as countertops- some of the laminate choices look great without costing as much as granite.
Wow, what a transformation! Love it. And love your rug in front of the sink. Can you share the source?
They look awesome. What color and make did you use for your flooring? Thanks.
Looks great!
Love, love, Love ???? Such a beautiful transformation…. Love the contrast between cabinets and floor…. (had to go back and look, didn’t even notice the trash can..). I’d be so excited – would keep finding reasons to go into the “new” kitchen.
I didn’t notice the white trash can either! I think it blends in well with the cabinets!
Made mistake of using emojis in my above response…. not supposed to be question marks…. !!!!!!
This looks incredible! What a lot of work, but the results are well worth it! I have to say, though, that I think you would be a lot happier with less stuff on your counters. Try removing half of it, and see if it’s a lot easier to work. I say this because my counter tops used to look like yours, but I got a knife holder to put in a drawer, moved off mugs, plants, and canisters (bought rubbermaid containers to put in pantry), and it made such a difference both in looks and ease of cooking! BTW, your little girl is adorable! She’s definitely a keeper!
Beautiful! I agree that there is a lot of stuff on the counters, but I realize you may have added things just for the photo. I would also consider a more decorative trash can if you want to leave it out in the open, perhaps stainless steel or wicker. As for the cabinet above the microwave, I would leave as is because it will be very high and hard to acces if you raise it up. Instead I would decorate the tops of the cabinets. Baskets in a variety of shapes and sizes would be pretty and inexpensive. I have a collection of them hanging from the beam that runs down the middle of our family room, and I get compliments on it. A lot of my baskets came from garage sales and thrift stores. You could also mix them in with in with crocks and old metal items like colander, pitchers, etc. that fit in with the farmhouse look. That would add some height and texture. As for your backsplash, Sarah at Little Vintage Nest recently shared her headboard backsplash that they installed directly over tile. A speckled real or faux granite counter top similar to what you had at your last house would be nice. Since your cabinets are white, the beadboard could be a different color, maybe even your wall color, or a soft shade of green. Good luck! Love your posts! Enjoy Christmas with your sweet baby girl!
Looks great!!!
It was refreshing to read a blog post that was not an affiliate post! We all want to see real people working on the house in which they live. Bloggers have photoshopped the life out of blogs. The trash can proves you are real. I enjoy watching you make this your home – not a magazine layout. Your daughter is growing way to fast! What a cutie!
If you’re taking votes… I vote to leave the stuff on your counters : ) It saves you one less step of having to open a drawer or cupboard before you use it– therefore saving time, and I’m a great lover of saving time! And only get a stainless steel trashcan if you can find one for $11 at an auction….
You did a great job. Painting cabinets has always intimated me, so I’ve never tried it. I recently moved to a house with cabinets I like, so I have lucked out there. As far as new counter tops go, I was SO SO happy to replace my black granite with Corian. It’s much easier to care for and doesn’t show water spots everywhere. I wish my counter tops were cleared off just like in the magazines, but it is never going to happen. You’re kitchen is beautiful.
Did you paint the insides of your cabinets? They look great by the way. I was told you did not need to prime with the magnolia pain is this true?
Looks great! Thanks for sharing. I’d like to do the same to my kitchen it’s sadly very outdated.
Looks great! How is the paint holding up now? I have put poly over paint in the past, but thought if this paint held up I could get rid of the extra work!
Would you recommend going DIY in this case?