(No Frugal Finds post this week as I haven’t been yard sale shopping in almost 3 weeks and I won’t be going this weekend either. ![]() So be sure to find something fun and share it with me on my facebook page!)
So be sure to find something fun and share it with me on my facebook page!)
Hey everyone! I am currently at Haven Conference this weekend in Atlanta – a Home/DIY Bloggers Conference – learning lots about blogging, running your own business, and even some DIY hands on classes with some of my favorite brands. And getting to hang out with some of my favorite bloggers and friends! Be sure to follow me on facebook or Instagram to catch a glimpse into this weekend.)
But I wanted to show you the next step of what has been happening in our kitchen makeover! I am just loving how it is coming along. I got the backsplash installed last week and when I get back next week I plan on painting the cabinets and installing new hardware, then it will be almost finished. Get all the information about why we decided to go with laminate countertops, how we ordered them ourselves at Home Depot, and how much money we saved by installing them ourselves vs. getting them installed in this post.
So the countertops were delivered straight to our house about a week after we ordered them. On the “L portion” of the corners they were cut at an angle and seamed together like this.
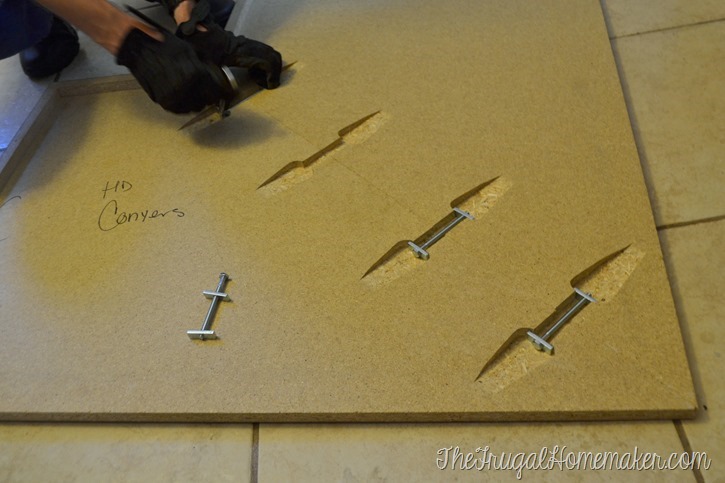
You put some wood glue in between the two pieces and then tighten the bolts down to hold them together and tighten the seam in the countertop.

I was SHOCKED at how EASY it was to install the countertops. Seriously. Another why did we do not this so many years ago!!? Each piece of countertop was literally screwed in place from the bottom with only 4-6 screws. That’s it – 4-6 screws. The only other things I bought were a box of screws so we could use new screws to put them on, and some clear silicone caulk to put around and under the edges of the sink. Since we got the new countertops custom ordered they were already cut and formed to the exact size and all my measurements were great! ![]() We had the small square counter and the “L shaped” counter by the stove and the “L shaped” bar top removed, backsplash removed, and new counters in under 2 hours. Seriously so easy. It probably took longer to pry the old backsplash off the wall then it took to remove/replace the countertops.
We had the small square counter and the “L shaped” counter by the stove and the “L shaped” bar top removed, backsplash removed, and new counters in under 2 hours. Seriously so easy. It probably took longer to pry the old backsplash off the wall then it took to remove/replace the countertops.
The sink portion of the counters was a bit more complicated and took a bit longer. But still not hard at all. We had to pull the dishwasher out to unscrew/screw in the counters and also remove the sink. My brother helped me with this part since he has installed counters and sinks before. You just disconnect the plumbing from the sink, unscrew the brackets holding the sink, loosen the caulk and remove.

Because our sink is a corner sink and falls in the middle and along 2 seams, the counter people cut out most of the sink hole but left the 2 corners so it would be secure for transport. But they already had it marked for us. We laid the counter in place, and then taped along the line to protect and prevent the counter from chipping.

Using a fine blade and a jigsaw we carefully cut along the line to complete the sink cut out. Again not hard at all – just take it slow and cautious and it was done in just a few minutes.

We then screwed that counter in place, replaced the sink, put the dishwasher back in place and it was done!
So now for the pictures – here’s the before…

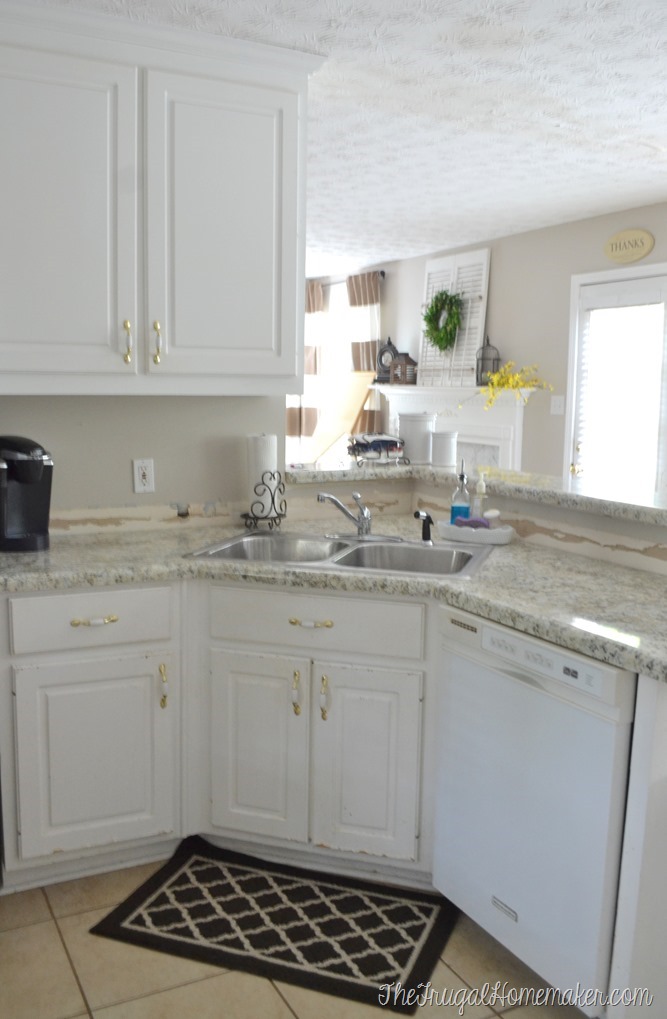
And here’s the after! Already so much brighter. Ignore wall where the short little piece of backsplash was – that will be covered up soon. We could have opted to have them make an integrated small backsplash piece onto these countertops but I wanted to install our own backsplash that would cover the entire wall.
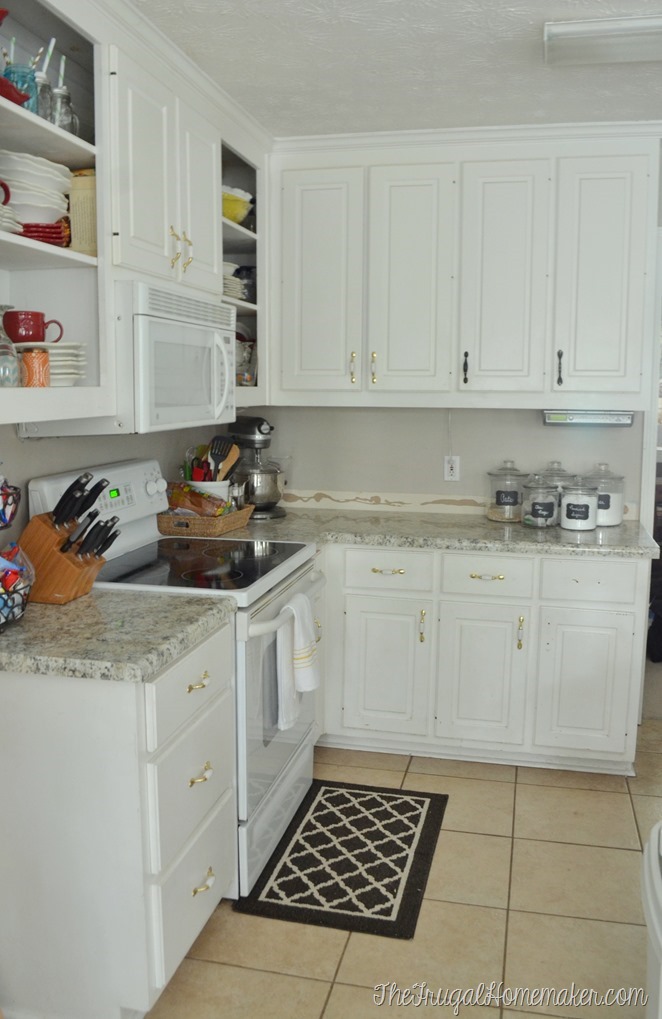
Here’s the sink portion before.

And here’s how it looked after!

The oven wall before…

And after! Having that wood piece gone makes a huge difference.
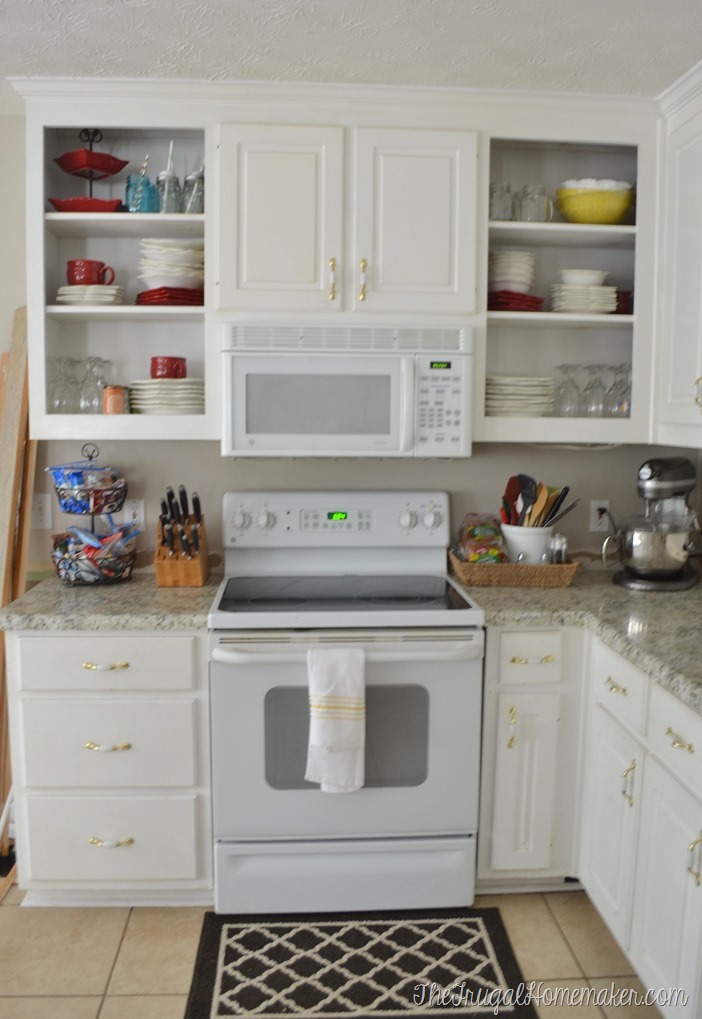
Here’s some more after pictures.
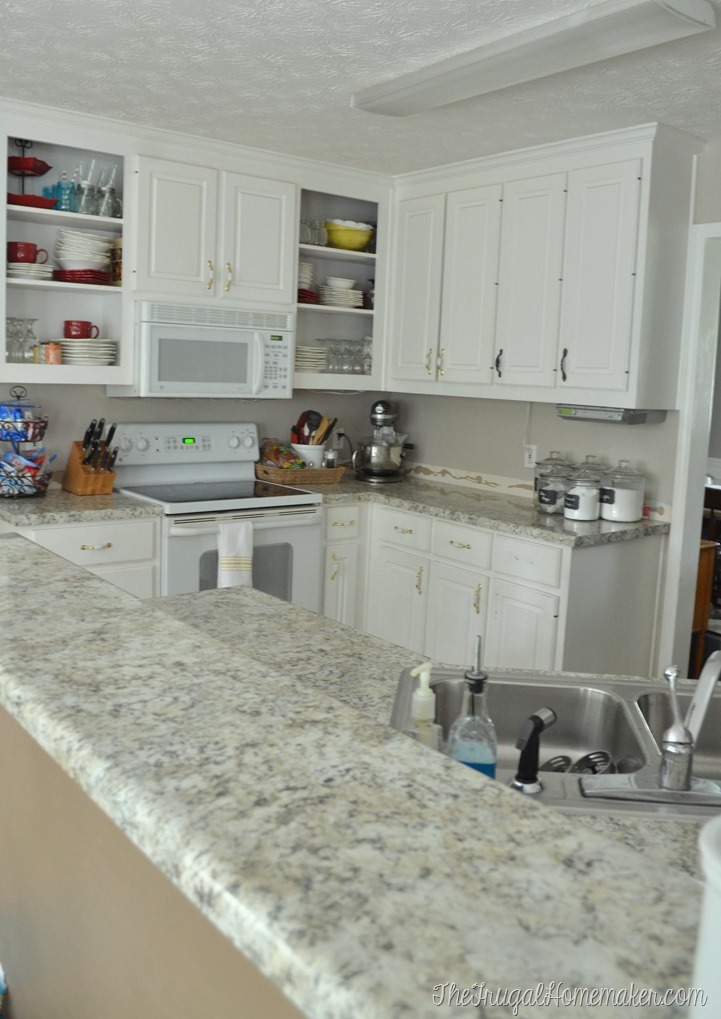

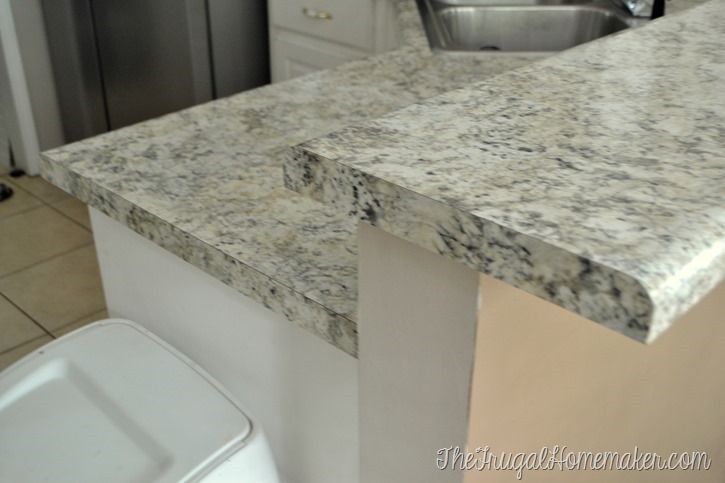
I love the way the ends of the counters look. We are just loving our new counters!
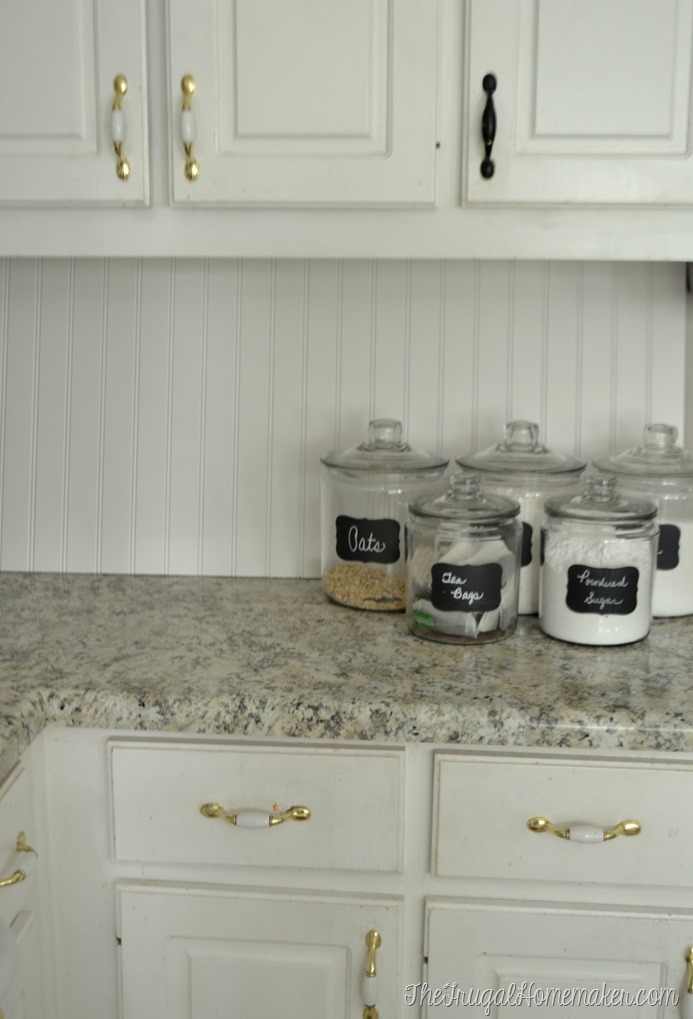
Here’s a sneak peak at the next step! ![]()
Hi Christina,
I LOVE your new counter tops – they look great in your kitchen! Can’t wait to see the new back splash and the final “reveal”.
Enjoy the weekend,
Lanita
It’s looking great Christina! I can’t wait to see it all come together and the big reveal!!
WOW!!! Unbelievable!! I have known about the “new” laminate, have gotten samples and now….I am thinking I can also “do it myself”. Excellent!! Can’t wait to see the rest of the transformation. I just love your blog, what you do with your home, and how you bargain hunt. Keep it up as you give inspiration to all of us, especially me. Have fun in Atlanta 🙂
Sally
Looks great!! 🙂
Enjoy your conference…
Sherr
Wow! Great job! It looks wonderful! You are amazing.
Wow, I can’t believe that is laminate! The before and after pictures are remarkable. We are gearing up for a kitchen remodel and I am leaning towards laminate vs. solid surface because the savings is too much to pass up. One question: did you measure yourselves or did you have a professional come out to measure before you ordered? Thanks!
Wow, it looks so nice, I haven’t even thought of looking at laminate. Loving the sneak peak, your kitchen is looking gorgeous.
This looks fantastic Christina!! I love all your frugal ways.
Refreshing to read.
i love the way this really updates the of your kitchen! It looks great.
Your kitchen looks great! I noticed that your hardware was “in progress”. I wanted to share this with you. It’s from House Revivals on pinterest. “Anthropolgie Inspired”. Your cabinet hardware reminded me of hers. Love what you do. http://houserevivals.blogspot.com/2012/08/cabinet-hardware-makeover-anthropologie.html?m=1
Which countertop did you go with? Is this Wilsonart or Formica? Looks great.
can any body explain to me how to cut the countertops with a corner sink like this out of a strait countertop?
I need to know this myself!! I’m in process of building a new house and want my sink in the corner im just not sure how to cut the countertop to make it fit!!!
I can’t believe that the countertops were able to be installed so easily! The laminate looks really great, too; it looks a lot like granite, even though I’m sure it’s much cheaper! This is making me want to try replacing my kitchen’s countertops! Thanks for sharing.
These look fantastic. You did a great job!!
I really like your new counters! I love how its laminate which is super easy to clean, but has a granite feel to it. Thanks for sharing!
Hi! I have the same kitchen sink layout as yours and was wondering if you’ve had any issues with water getting into the seams of your cut laminate near your sink? I was all ready to order laminate for our kitchen and was advised not to use it because of potential water damage. Please advise. Thank you!
Hi! we are look to have our ugly ivy green 90’s laminate replaced and have a corner sink just like yours. How and where did you get the counter to fit that angled shape??!! I have searched and searched for a way to do this ourselves and save some big bucks but that part is what is keeping me from risking it. Any help or advice would be very much appreciated! Looks great by the way!
Wow great work! I really appreciate the progress pictures throughout the entire process, thanks for sharing!
It’s really amazing post. I like your information. Thank You for shear a great information.
Was the piece for you sink a custom piece or did you piece it together somehow? Ours is the same and we’re trying to figure out how to do it.
Maybe I missed this, but where did you order your countertops from? And what color/brand is it?
This looked great I want to replace my counters and my only fear is the sink cut and how to measure can you give me some pointers
Love how your makeover turned out. I have a corner sink too and am weighing my options on replacing my countertops (while keeping my corner sink).
My apologies if this was already stated/asked but I wanted to clarify if you placed your sink on the countertop seam (and left off 1-2 seam bolts) or if you ordered a solid corner countertop and placed it there? In the article, you mentioned your sink falling between 2 seams but the pics of the sink portion of the countertop looks like 1 solid piece. If you did place it between the seams, did you reinforce the countertop? Have you noticed any sagging?
Did you order the bar piece too? I redid mine as well but not that bar piece. Didn’t know how to proceed w that. Great job!
Love this! What type of countertops are these?
May I know the make and model of your laminate countertop? Pretty and I would like to use it for my own countertop. Thanks.